Old WanBridge Manual

How to crosschain your assets using WanBridge Web
Step 0: Make sure you have the appropriate wallets.
Before completing decentralised crosschain transactions using WanBridge Web, you need to ensure you have access to the correct wallet(s). You must have wallets for each network involved in the crosschain transaction. In other words, if you are moving $BTC from Bitcoin to Ethereum, you need to use Bitcoin and Ethereum wallets. Similarly, if you are moving $LTC from Wanchain to Moonriver, you need Wanchain- and Moonriver-compatible wallets.
This guide demonstrates a crosschain transaction moving $ETH from Ethereum to Wanchain and uses Metamask. Metamask is a fantastic wallet that grants you access to any EVM-compatible blockchain network.
Step 1: Visit https://bridge.wanchain.org/
Step 2: Click “Select asset please” on the left side of the terminal.
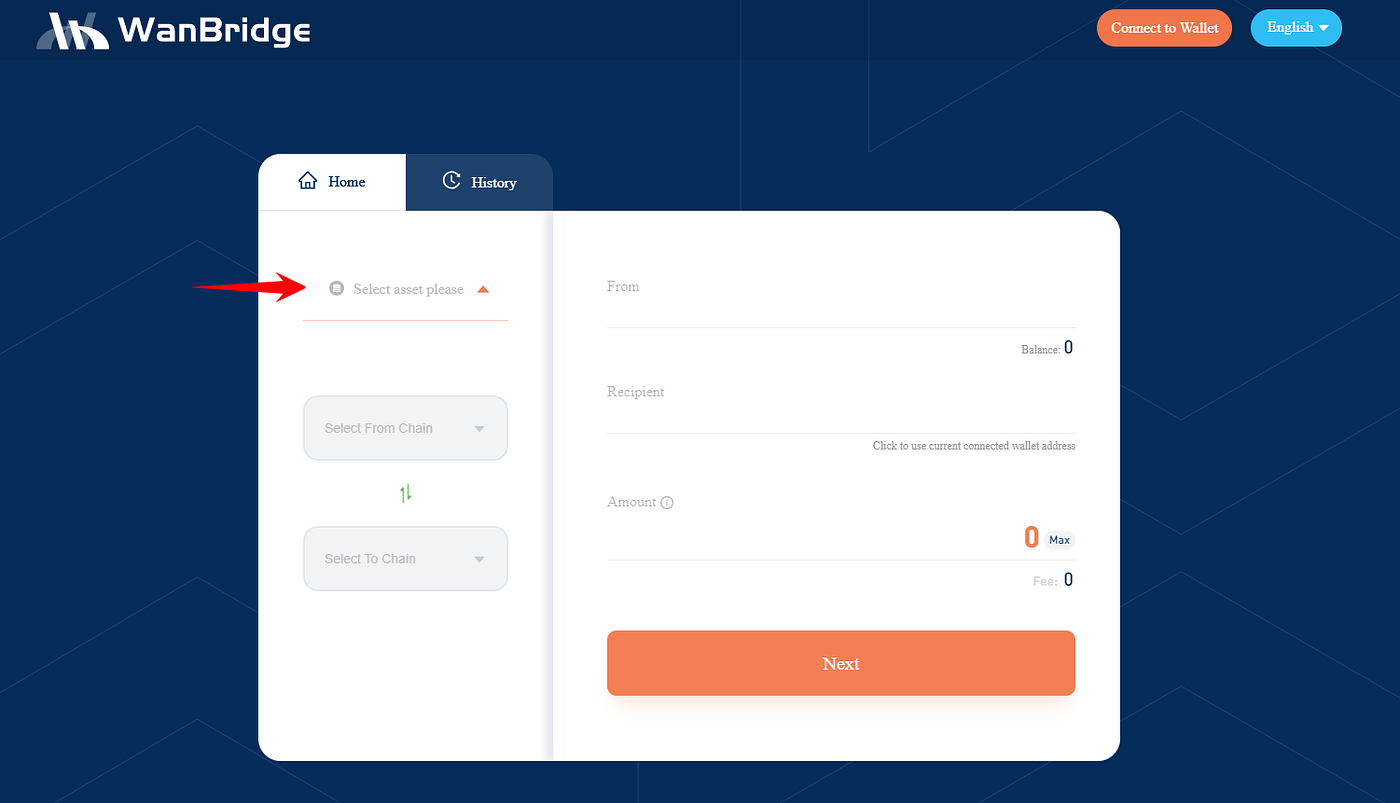
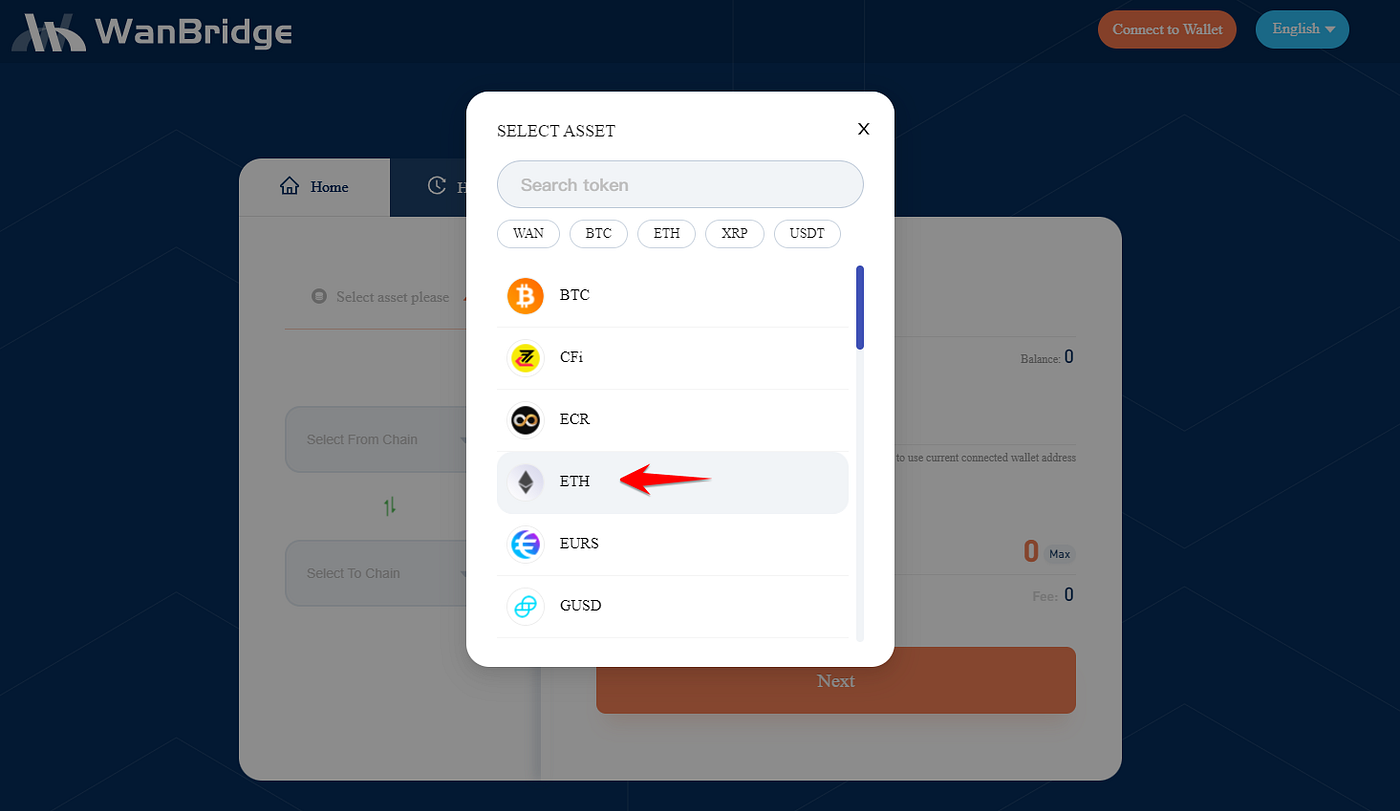
Step 3: Select the asset you want to move crosschain from one blockchain network to another.
In this example, we select $ETH because we are moving $ETH.
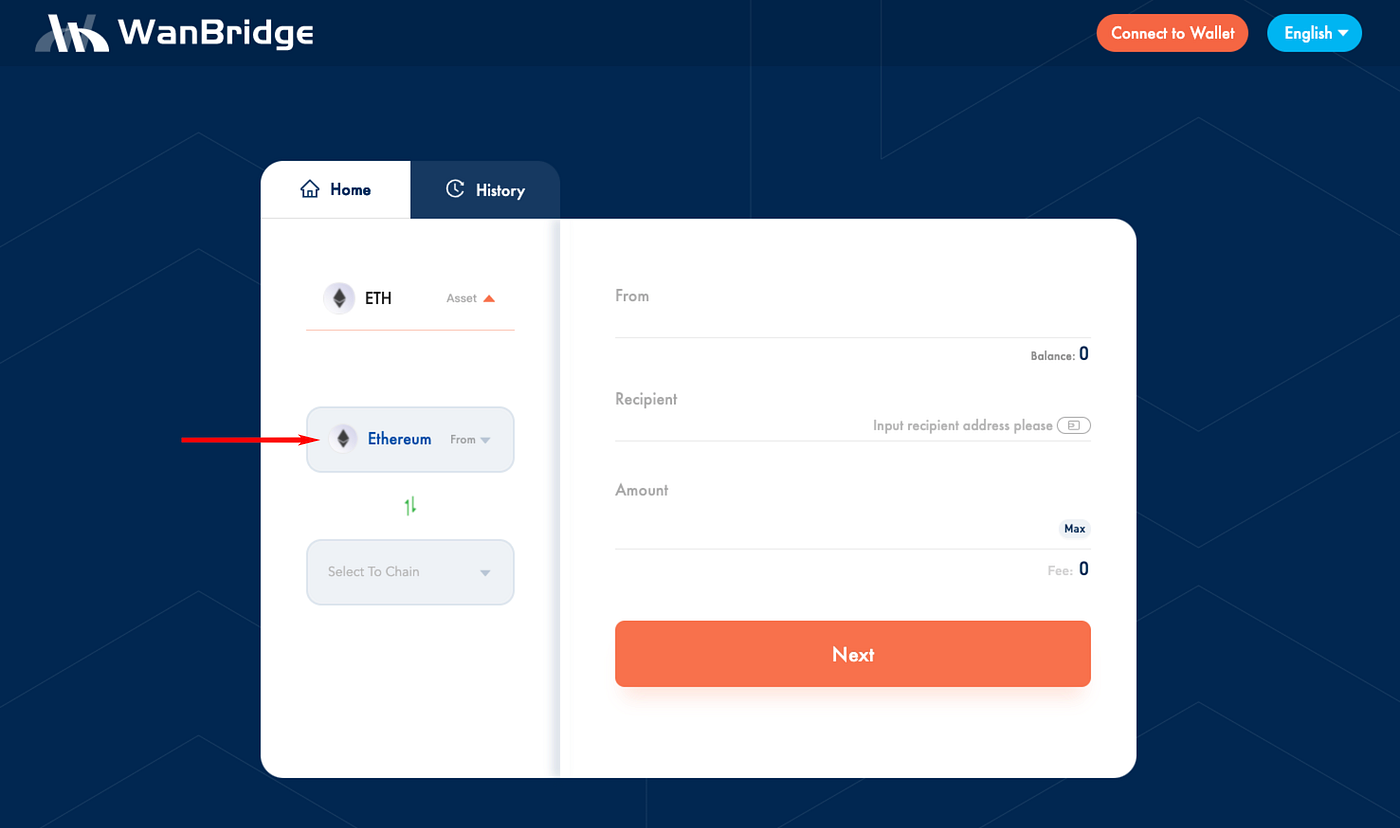
Step 4: Click “Select From Chain” and select the origin chain.
In this example, the origin chain is Ethereum because the $ETH is currently on Ethereum.
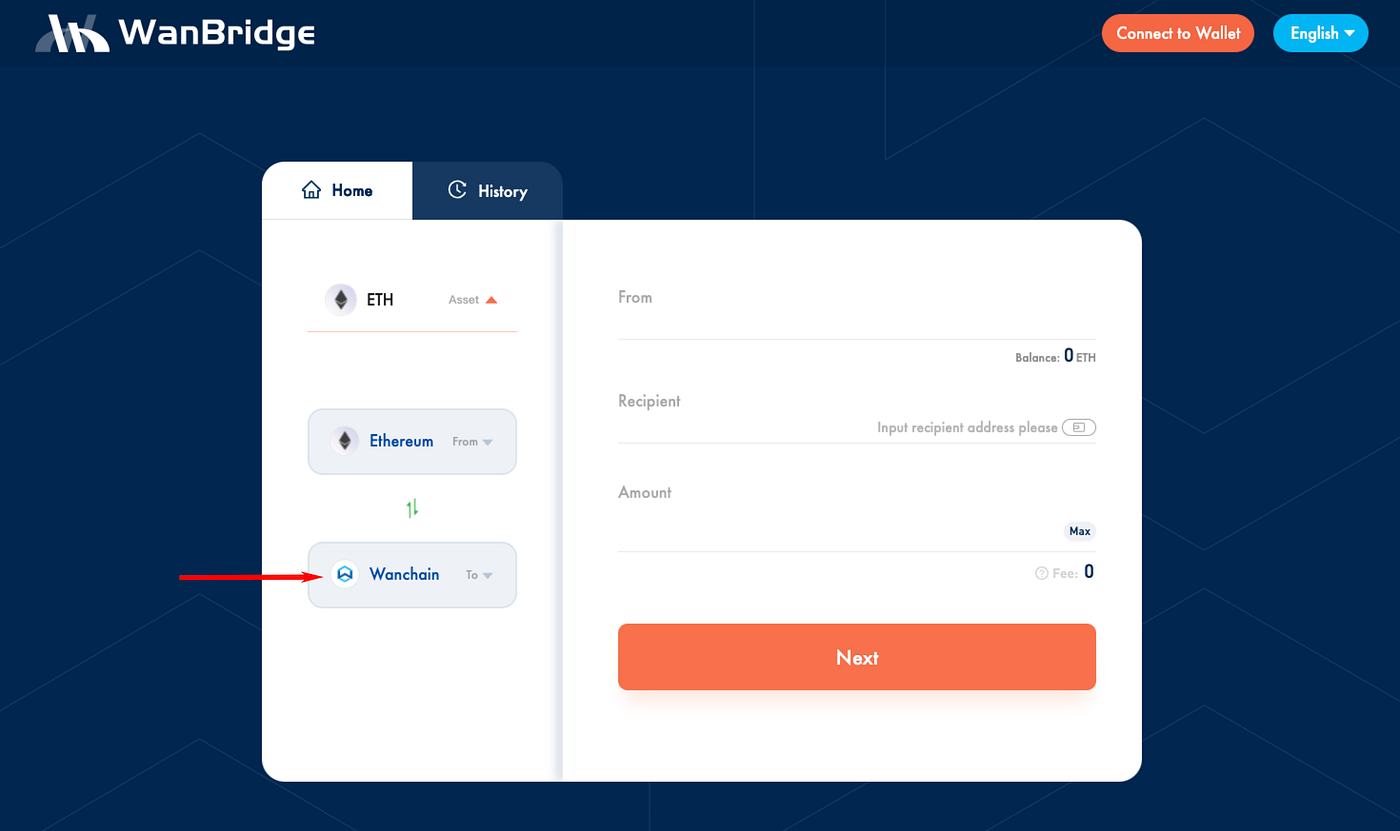
Step 5: Click “Select To Chain” and select the destination chain.
In this example, we are moving $ETH to Wanchain. So, Wanchain is the destination chain.
Step 6. Click “Connect to Wallet” in the top right corner of the window.
Step 7: Select the appropriate wallet.
In this example, we are using MetaMask connected to the Ethereum network.
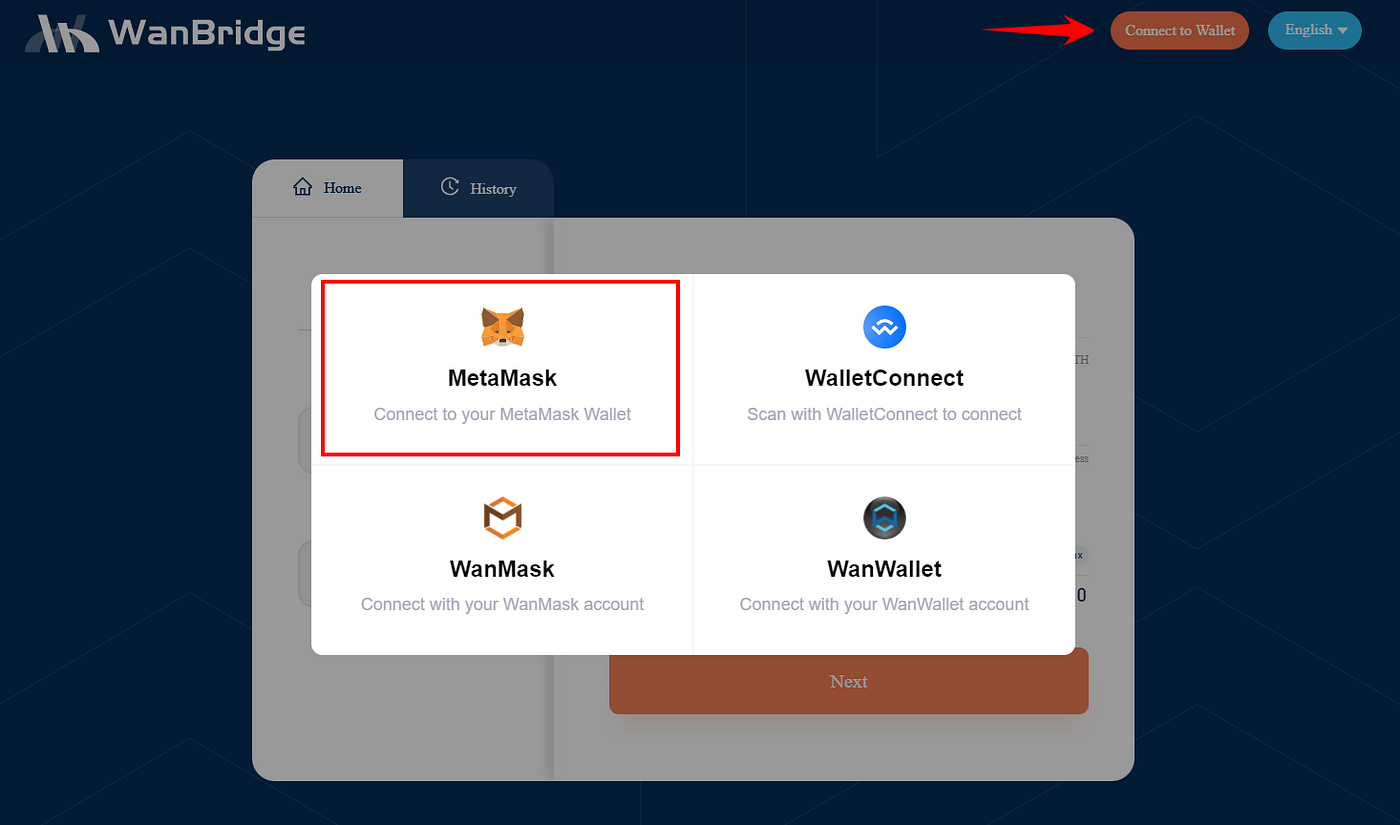
When connecting Metamask for the first time, you will need to click connect in the Metamask pop-up window. Your Ethereum wallet address will now be connected to WanBridge Web. Your ETH balance should also be visible.
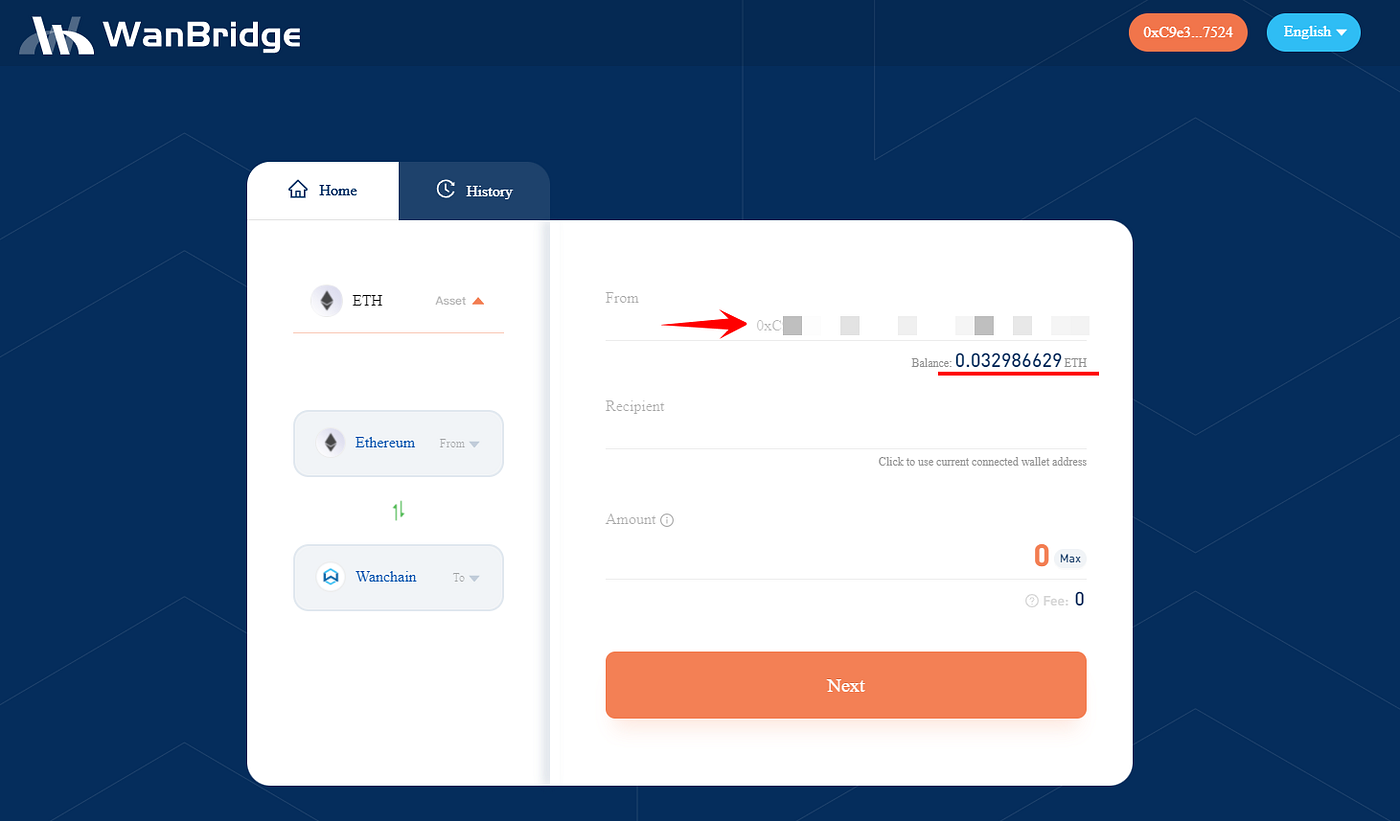
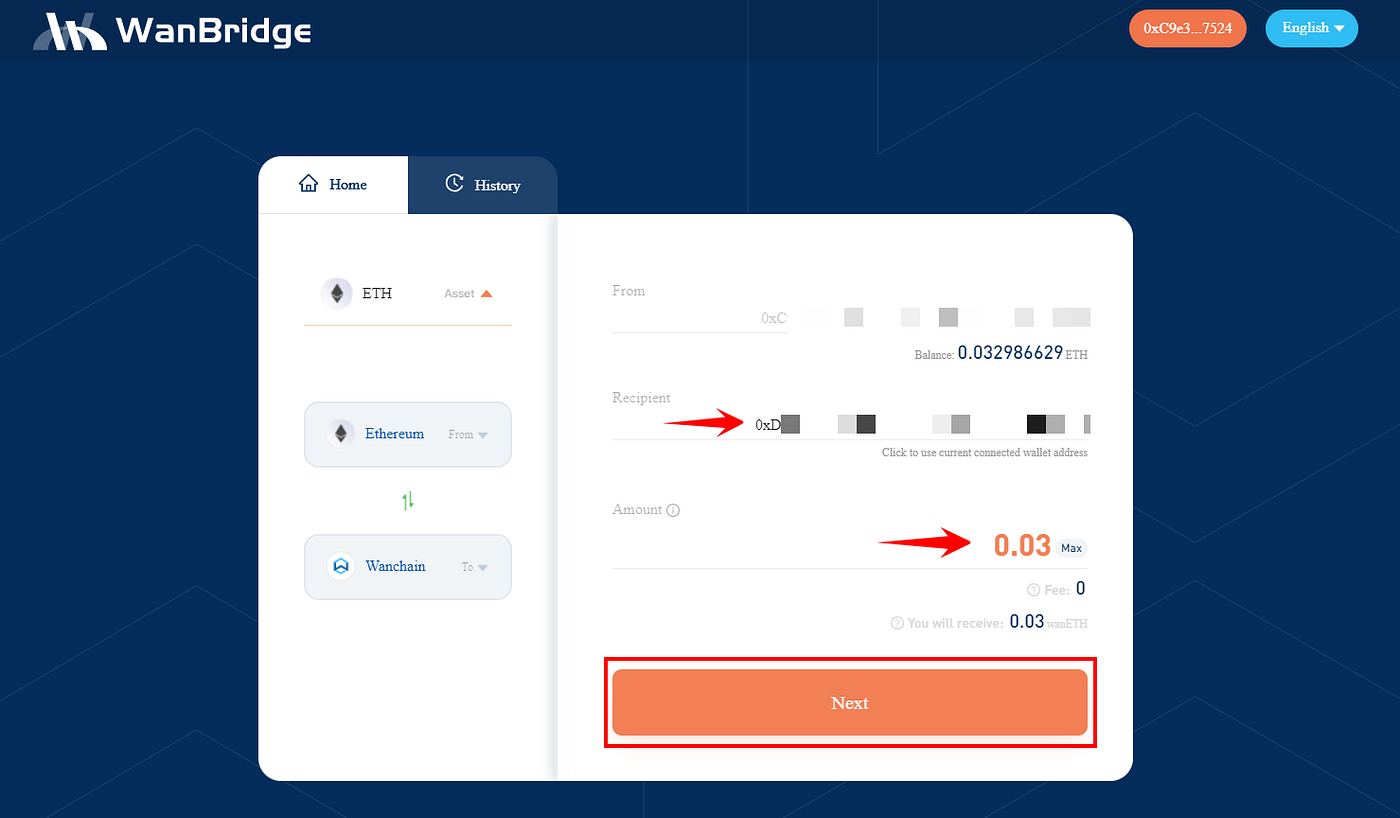
Step 8: Enter your recipient address. This is the address that you want to send your assets to on the destination chain.
In this example, as we are moving $ETH to Wanchain, the Recipient address is a Wanchain address.
Step 9: Enter the amount you wish to convert and then click “Next”.
Step 10: On the next page, review all the information relating to your crosschain transaction and click “Confirm”.
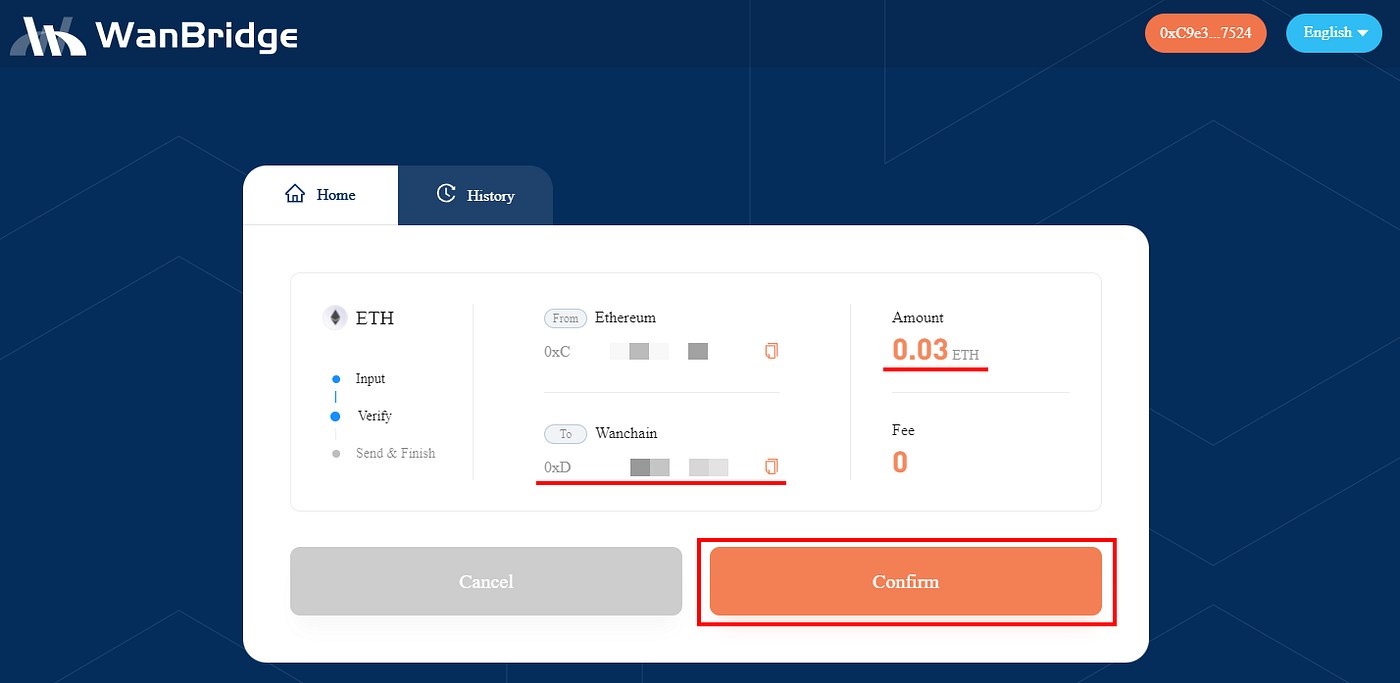
Be sure to double check your To address and the Amount you are sending crosschain. When using Metamask, you will also need to confirm the transaction in the MetaMask pop-up window. Make sure to use an appropriate gas fee to ensure your ETH transaction doesn’t get delayed.
Step 11: Wait.
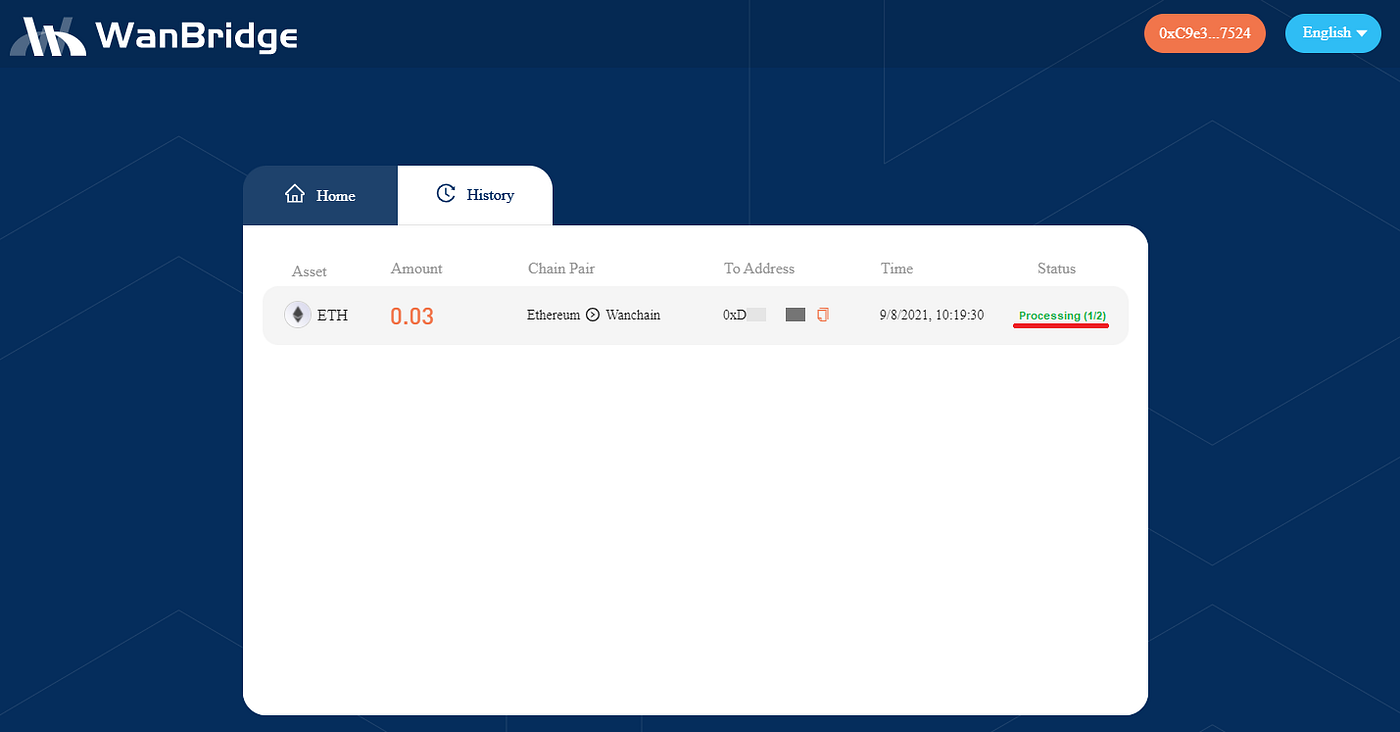
Your crosschain transaction is now being processed. It will appear as Processing. The amount of time a crosschain transaction takes is entirely depending on the speed of the blockchain networks involved. For example, an $XRP transaction from XRP Ledger to Avalanche might only take a few minutes while a $BTC transaction from Bitcoin to Binance Smart Chain could take an hour.
Step 12: Confirm the receipt of your funds.
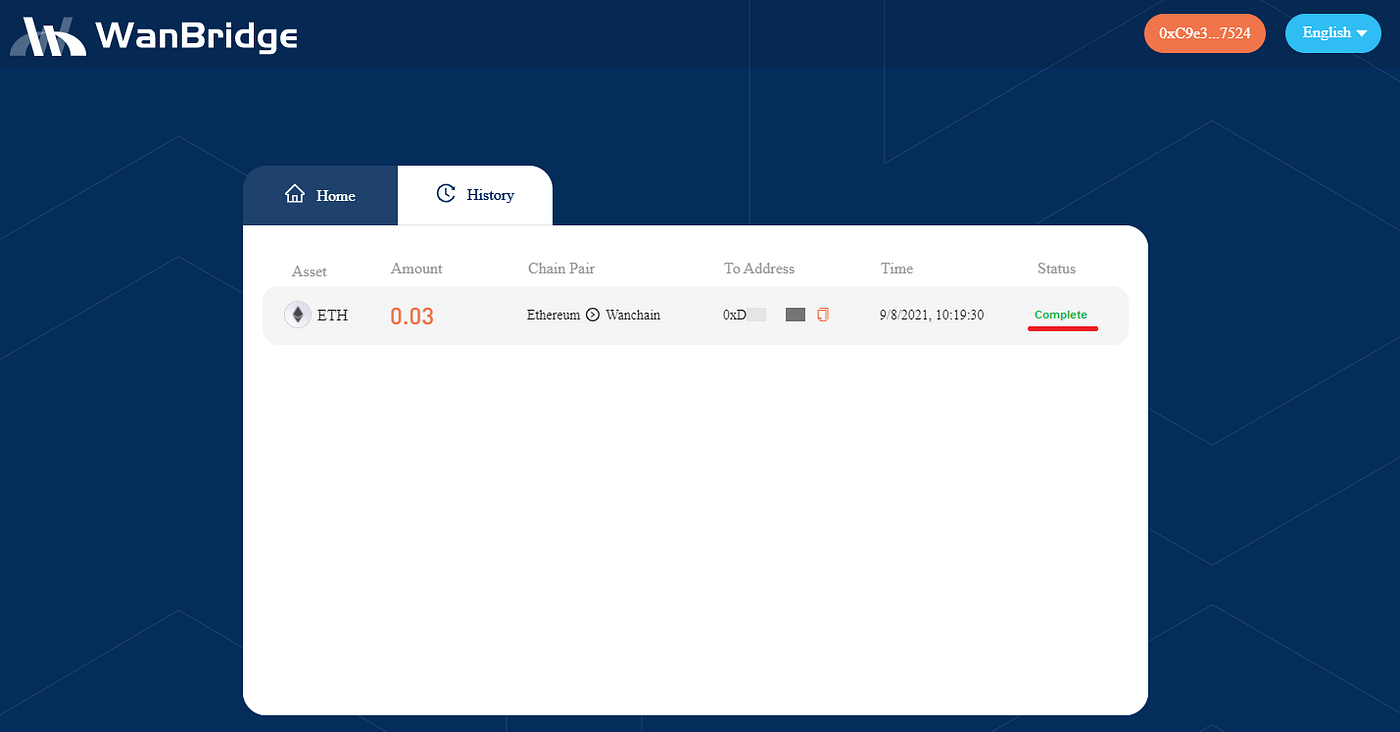
Once your crosschain transaction status changes to Complete, you can confirm receipt of funds in your Recipient address. In this example, the Recipient Wanchain address now has $wanETH.
Congratulations! You have completed a crosschain transaction using Wanbridge Web!
Note: Crosschain assets use different nomenclature depending on the destination chain. Assets moved to Wanchain use the ‘wan’ prefix (ie. ETH becomes wanETH, XRP becomes wanXRP, etc.). Crosschain assets on different blockchain networks may use a slightly different naming scheme. For instance, crosschain assets on Avalanche use the ‘.a’ suffix (ie. BTC becomes BTC.a, WAN becomes WAN.a).
Last updated