> For the complete documentation index, see [llms.txt](https://docs.wanchain.org/llms.txt). Markdown versions of documentation pages are available by appending `.md` to page URLs; this page is available as [Markdown](https://docs.wanchain.org/wanchain-bridge-nodes/deploy-a-bridge-node/deploy-a-bridge-node-via-xstake-recommended.md).
# Deploy a Bridge Node via XStake (Recommended)
## 0. Node Overview & Requirements
To become a Wanchain Bridge Validator (also known as a Storeman Node), please ensure your environment meets the following hardware and staking requirements.
**Hardware Specifications**
| Item | Minimum Requirements |
| ---------------- | ---------------------- |
| CPU | 2 cores |
| RAM | 8 GB |
| Disk Space | 80 GB |
| Operating System | Ubuntu 22.04 and above |
**Key Policy Details**
* **Minimum Stake:** 10,000 WAN
* **Staking Period:** \~30 days (from the 9th of each month to the 9th of the following month)
* **Node Selection:** Only the top 25 nodes by total stake will be selected as active validators. Unselected nodes may withdraw their funds after the 10th of each month.
* **Node Exit:** If you initiate an exit during the month, you can withdraw the staked WAN after the 10th of the following month.
* **Registration Window:** Monthly from 1st 04:00 a.m. UTC – 5th 04:00 a.m. UTC
## 1. Access the XStake Website
1. Visit the official XStake portal:
2. Navigate to **Validator Node** > **Setup Bridge Node**.
3. Review the requirements thoroughly before proceeding with the setup.
## 2. Registration and Selection Process
In order to form a WanBridge, **25 Storeman nodes** must work together. In order to choose which 25 nodes may form a WanBridge, there is a selection process based on the amount of stake in each node. The 25 nodes with the most WAN staked will be selected. In order to be considered for selection, node operators must register their node with a on-chain transaction.
Process Summary: You will run a script to generate a **Work Address**, **Public Key**, and **EnodeID**. These credentials are required for the registration step.
### 2.1 Generate Public Key and NodeID
Run the following commands in a secure Linux Ubuntu environment.
Note: Rename or delete `osm` if it already exists at `/home/user`
```shell
wget https://raw.githubusercontent.com/wanchain/scripts/refs/heads/main/storeman/mainnet/envSetup.sh && chmod +x envSetup.sh && ./envSetup.sh
```
**Post-Script Actions:**
1. A folder named `osm` will be generated at `/home/user`. This folder is critical for running your node.
2. **Backup both the script output and the osm folder. If you are running these scripts locally, you will later need to copy the `osm` folder generated by these scripts to your cloud server.**
The output will look similar to the example below; keep these values ready for the XStake registration.
```
!!!!!!!!!!!!!!! Important !!!!!!!!!!!!!!!
\==================================================
Please Backup Your Work Address
“0x733452e4b0b6e0ae2248b0b46918d64bc8771bf2”
\==================================================
Please Backup Your Work Public Key
\==================================================
Please Backup Your Keystore JSON String
{“address”:”733452e4B0B6E0AE2248B0b46918d64BC8771BF2",”crypto”:{“cipher”:”aes-128-ctr”,”ciphertext”:”c6d8fbe6a885b8471f4c22835db0cbac7fbfe0c9f2f397d1eadd9840e9e5d4f3",”cipherparams”:{“iv”:”8d569d4c96d6ddd69de9a3f8a36a4216"},”kdf”:”scrypt”,”kdfparams”:{“dklen”:32,”n”:262144,”p”:1,”r”:8,”salt”:”2f0c2c117891a3e9f26766b591a6998c1cfeb2aff9e411f301743d9bd1da7bdb”},”mac”:”93bf267476286be3b8296d665107f412c1f7eae56afc4fce9a78ca28bdeb4693"},”crypto2":{“cipher”:”aes-128-ctr”,”ciphertext”:”129e452adbd5bbd2ba9ae6bea7b54641e6c32064cb25d813dc62debbe4335070",”cipherparams”:{“iv”:”736febbacaf06e4e61c1d0cf8010f8e6"},”kdf”:”scrypt”,”kdfparams”:{“dklen”:32,”n”:262144,”p”:1,”r”:8,”salt”:”88e483a2fce18c6efc289111f70010fd6833fe9d579069902ae827c109017766"},”mac”:”a894cd1b61a6ab7d92d53da3ed9da07c7d6ddb83d29212f4ca44ad55468c0cdb”},”id”:”7cb62af2-d704–4d09–9c80–85cfa309ca82",”version”:3,”waddress”:”022d54ecef44b32fa8b7c6e8c1c4e64e2fbc96c98ee027cd7032f53d89a97be3c00315a46e2648cbf3adc080987846b030f3dbda9a3c9af1e753333ba185c6689511"}
\==================================================
Please Backup Your Nodekey String
6c99ddaaa5664bf8a0c36647b1a1a99dedb7f821415f6b6eeee9c1e60ac9d76b==================================================
Please Backup Your EnodeId String
0xa277dcfd46eaa436b795bdda227eb921ede625fd8560f33781a7ba273decfb4b09f5d41f9abdb3abedb10db15ef5b471b6405228a889e1e6d48faf0e2e9ed848
```
### 2.2 Staking WAN
**A) Register as a Storeman Candidate**
Once the Wanchain Foundation opens a new Storeman Group, the "Setup Bridge Node" section will activate.
1. **Input Credentials:** Enter the Public Key and EnodeID generated in step 2.1.
2. **Stake WAN:** Ensure your connected wallet has the required WAN. Enter your staking amount (minimum 10,000 WAN).
3. **Confirm:** Review the details and click Confirm to send the registration transaction.
**B) Increase Selection Chances**
After becoming a "Candidate," you can view your ranking on "My Bridge Staking". To improve your chances of reaching the top 25:
* **Top-up:** Add more self-staked WAN via My Bridge Staking.
* **Attract Delegations:** Open your node to community delegations to increase your total stake weight.
## 3. Selection Results and Cloud Server Configuration
### 3.1 Check Selection Result
Verify your status on the My Bridge Staking page:
* **Selected:** Your node has successfully entered the Storeman Group. Proceed to server setup.
* **Not Selected:** Your node failed to make the top 25. You may claim your WAN back.
### 3.2. Cloud Server Configuration
**Recommended Specifications**
A public IP without a proxy is required. Cloud and bare metal servers are both supported. The following table shows the requirements:
| | |
| ---------------- | ---------------------- |
| CPU | 2 cores |
| RAM | 8 GB |
| Disk Space | 80 GB |
| Operating System | Ubuntu 22.04 and above |
**Prepare Keystore and Nodekey**
If you ran the setup scripts locally, please copy the Keystore and Nodekey files which were generated at `/home/user` to the same path on your cloud server. (See Section 2 for how to generate Public Key and NodeID)
### 3.3 Install Storeman Service
**a) Fund Work Address for Gas Fee**
Your Work Address (generated in 2.1) needs a small amount of WAN (e.g., 20 WAN) to pay for gas fees during operation. If the balance is 0, the node will fail.
**b) Environment Setup**
**Open Ports:**
Log in to your cloud server platform (such as AWS). Enable the following ports in the firewall inbound settings: **TCP 37718/UDP 37718**, and enable the following ports in the firewall outbound settings: **TCP 26891/ TCP 26892/ TCP 30000 (By default, the outbound rule in most cloud platforms is set to open, so you just keep the default settings of outbound ports).** If you modify the ports of the scripts, please add the related port in your firewall.
* [AWS help doc](https://docs.aws.amazon.com/vpc/latest/userguide/VPC_SecurityGroups.html)
* [Google Cloud help doc](https://cloud.google.com/vpc/docs/firewalls)
* [Alibaba Cloud help doc](https://www.alibabacloud.com/help/zh/doc-detail/25471.htm)
**Initialize the environment:**
```
sudo chown $USER ~/osm
cd ~/osm
rm init_open_storeman_EnvV3.sh
wget https://raw.githubusercontent.com/wanchain/scripts/refs/heads/main/storeman/mainnet/init_open_storeman_EnvV3.sh && chmod +x init_open_storeman_EnvV3.sh && ./init_open_storeman_EnvV3.sh
rm startStoremanV5.sh
wget https://raw.githubusercontent.com/wanchain/scripts/refs/heads/main/storeman/mainnet/startStoremanV5.sh && chmod +x startStoremanV5.sh
```
**c) Start Storeman Agent**
Start Agent
```
cd ~/osm/
./startStoremanV5.sh
```
Follow the steps of scripts
* Choose the network of Storeman: mainnet

* Input Work Address (generated in section 2.1) of **YOUR** Storeman node (DO NOT input the following work address!!)

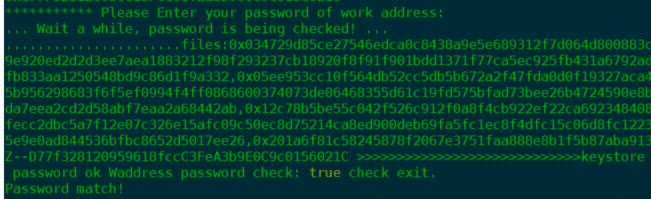
* Input the password of your Work Address. If it shows “Password match!”, it means that your password is correct
* Choose whether to use KMS to encrypt the private key fragments
AWS Key Management Service (AWS KMS) is a key management serevice provided by Amazon. It can be used to create and manage your master key. Users can choose whether to encrypt private key fragments by using KMS. (Encryption is recommended. It strengthens the security of funds).
If you want to create KMS, you could refer to
If you need to use KMS, please enter `Y` when running the scripts, and you need to provide the relevant information corresponding to the KMS. When it shows “KMS match!” , it means that the KMS-related information you entered is verified correctly.
> *User Access key ID: AKIAJPUJ\*\*\*\*\*\*\*\*\*\**
>
> *User Secret Access Key: KiHjz0g12a\*\*\*\*\*\*\*\*\*\*\**
>
> *KMS Key Region: us-east-1*
>
> *KMS Key ID (ARN): arn:aws:kms:us-east-1: \*\*\*\*\*:key/\*\*\*\*\**

If you don’t need KMS, please enter N when running the scripts and choose not to use KMS for encryption

When you choose not to use the KMS encryption service, please choose whether to save the password locally to support automatic update, which facilitates the automatic upgrade of the agent in the future. Please select Y for agree, and N for refuse.
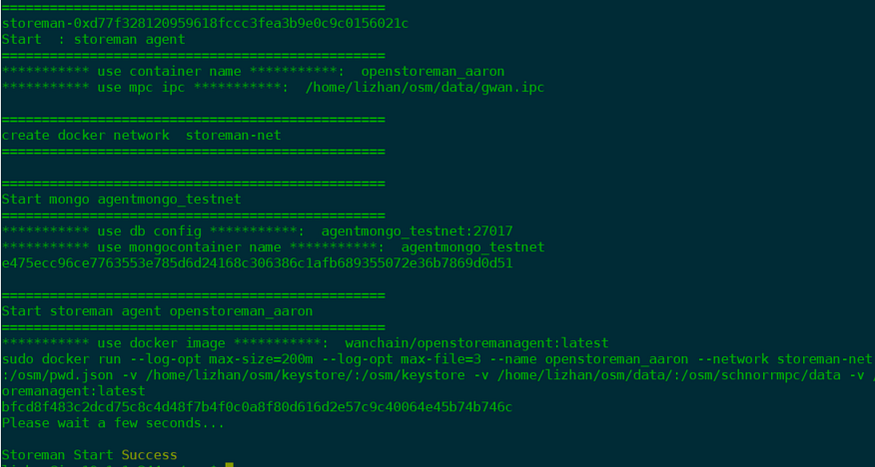
 The script will automatically start Docker to create the Storeman service. If it displays Storeman Start Success, it means the service starts normally.
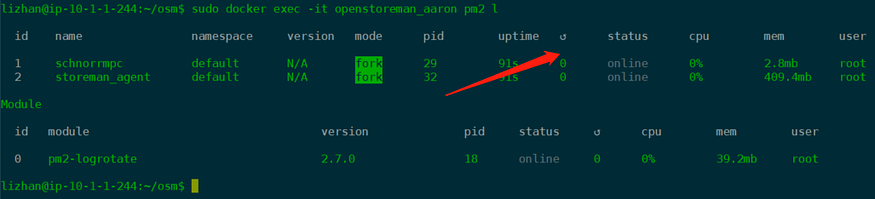
**d) Check Agent Container Status**
```
sudo docker exec -it openstoreman_mainnet pm2 l
```
Status of **online** and restart times of **0** represent normal status.
**e) Verify the connection number of Storeman Peers**
Open mpc console through ipc, and check the number of connected MPC nodes in console:
```
sudo docker exec -it openstoreman_mainnet ./schnorrmpc/bin/schnorrmpc attach ./schnorrmpc/data/gwan.ipc
admin.peers.length
```
Confirm the returned peer node information, which indicates the current number of MPC node connections. It should be 1 or 25. If the number is abnormal, please contact Wanchain techsupport team.
* In the Seleting Time for the Storeman Group, the peer number should be 1,
* In the Ready status for the Storeman Group, the peer number should be 25.
## Restart Service
If there is something wrong with your node, try to restart your service
```
cd ~/osm/
./startStoremanV5.sh
```
## 4. Storeman Group Running Period
On the My Bridge Staking page, you can monitor your node's real-time status, increase your stake, claim earned rewards, or initiate the exit process.
### 4.1 Top-up Stake
During the Storeman Group working period, you can top-up WAN to your Storeman.
### 4.2 Claim Rewards
You can claim your rewards every day. But the deposits can only be claimed when the entire Storeman Group period has concluded.
### 4.3 Exit
You can choose to enter the next round or exit the selection process before the next Storeman Group is formed.
You can top-up your staking amount at any time.
*(Note: a cycle is one month — cycle time subject to change in future)*
After a cycle completes, you can claim your both deposits and rewards, and enter the next round.
## 5 How to Delegate WAN to a Storeman Node
If you want to support a specific Storeman node through delegation, follow these steps:
1. Locate Delegation Section: Click the "Delegate to Bridge" button on XStake.
2. Select a Node: Browse the list to find the Storeman node you wish to support.
3. Manage Delegations:
* You can add more WAN to an existing delegation at any time during the operational period.
* Rewards: Delegators can withdraw their portion of the rewards daily.
* Withdrawal: Both the principal delegation and any unclaimed rewards become available for withdrawal after the cycle ends.
> Note on Selection Weight: Increasing the delegation amount improves the Storeman node’s "weight" (ranking), which enhances its chances of being selected for the next group. However, rewards only begin to accrue once the Storeman Group has successfully transitioned to the "Working" status.
## 6 Appendix
Here is an example of the results of runnin Public Key and EnodeID scripts
ubuntu@ip-10-1-1-105:~$ wget https://raw.githubusercontent.com/wanchain/two-way-bridge-contracts/master/helpscript/envSetup.sh &&  chmod +x envSetup.sh && ./envSetup.sh
\--2020-09-28 09:41:22--  [https://raw.githubusercontent.com/wanchain/two-way-bridge-contracts/master/helpscript/envSetup.sh](https://raw.githubusercontent.com/wanchain/two-way-bridge-contracts/master/helpscript/envSetup.sh)
Resolving raw.githubusercontent.com (raw.githubusercontent.com)... 151.101.52.133
Connecting to raw.githubusercontent.com (raw.githubusercontent.com)|151.101.52.133|:443... connected.
HTTP request sent, awaiting response... 200 OK
Length: 2946 (2.9K) \[text/plain\]
Saving to: ‘envSetup.sh.1’envSetup.sh.1                                        100%\[===================================================================================================================>\]   2.88K  --.-KB/s    in 0s      2020-09-28 09:41:22 (54.6 MB/s) - ‘envSetup.sh.1’ saved \[2946/2946\]==========================================
|  Welcome to Mainnet Validator Deploy   | !!!!!! WARNING Please Remember Your Password !!!!!!!!
 !!!!!!Otherwise You will lose all your assets!!!!!!!!
Enter your password of validator account:
Confirm your password of validator account:latest: Pulling from wanchain/openstoremanagent
419e7ae5bb1e: Already exists
848839e0cd3b: Already exists
de30e8b35015: Already exists
258fdea6ea48: Already exists
ca1b0e608d7b: Already exists
dd8cac1f0c02: Already exists
38a17b67fe0d: Already exists
e19d627f8e7d: Already exists
3944518be6fb: Already exists
31dfd4404907: Already exists
95d02f3cb2af: Pull complete
abe226af4359: Pull complete
62f13a73a9a6: Pull complete
2b43fcba66b2: Pull complete
Digest: sha256:d8bd070ebceaeba3be894a23d454fb138b9f16c4f1b8490b2597e9c0b9ad409c
Status: Downloaded newer image for wanchain/openstoremanagent:latest
docker.io/wanchain/openstoremanagent:latest
WARN \[09-28|09:41:40\] No etherbase set and no accounts found as default
INFO \[09-28|09:41:40\] Allocated cache and file handles         database=/osm/schnorrmpc/data/gwan/pos cache=16 handles=256
INFO \[09-28|09:41:40\] Allocated cache and file handles         database=/osm/schnorrmpc/data/gwan/rblocaldb cache=16 handles=256
INFO \[09-28|09:41:40\] Allocated cache and file handles         database=/osm/schnorrmpc/data/gwan/eplocaldb cache=16 handles=256
INFO \[09-28|09:41:40\] Starting peer-to-peer node               instance=gwan/v2.1.5/linux-amd64/go1.13.4
INFO \[09-28|09:41:40\] Allocated cache and file handles         database=/osm/schnorrmpc/data/gwan/chaindata cache=128 handles=8192
INFO \[09-28|09:41:40\] Writing default main-net genesis block
INFO \[09-28|09:41:40\] Initialised chain configuration          config="{ChainID: 1 Byzantium: 0 Engine: ethash}"
INFO \[09-28|09:41:40\] Disk storage enabled for ethash caches   dir=/osm/schnorrmpc/data/gwan/wanhash count=3
INFO \[09-28|09:41:40\] Disk storage enabled for ethash DAGs     dir=/root/.wanhash                    count=2
INFO \[09-28|09:41:40\] Initialising Wanchain protocol           versions="\[63 62\]" network=1
INFO \[09-28|09:41:40\] Loaded most recent local header          number=0 hash=0x0376899c001618fc7d5ab4f31cfd7f57ca3a896ccc1581a57d8f129ecf40b840 td=1048576
INFO \[09-28|09:41:40\] Loaded most recent local full block      number=0 hash=0x0376899c001618fc7d5ab4f31cfd7f57ca3a896ccc1581a57d8f129ecf40b840 td=1048576
INFO \[09-28|09:41:40\] Loaded most recent local fast block      number=0 hash=0x0376899c001618fc7d5ab4f31cfd7f57ca3a896ccc1581a57d8f129ecf40b840 td=1048576
INFO \[09-28|09:41:40\] loaded cq cache                          eclapsed=270ns length=0
INFO \[09-28|09:41:40\] Regenerated local transaction journal    transactions=0 accounts=0
INFO \[09-28|09:41:40\] Starting P2P networking
INFO \[09-28|09:41:40\] RLPx listener up                         self="enode://a277dcfd46eaa436b795bdda227eb921ede625fd8560f33781a7ba273decfb4b09f5d41f9abdb3abedb10db15ef5b471b6405228a889e1e6d48faf0e2e9ed848@\[::\]:17717?discport=0"
INFO \[09-28|09:41:40\] IPC endpoint opened: /osm/schnorrmpc/data/gwan.ipc
INFO \[09-28|09:41:45\] IPC endpoint closed: /osm/schnorrmpc/data/gwan.ipc
INFO \[09-28|09:41:45\] Blockchain manager stopped
INFO \[09-28|09:41:45\] Stopping Wanchain protocol
INFO \[09-28|09:41:45\] Wanchain protocol stopped
INFO \[09-28|09:41:45\] Transaction pool stopped
INFO \[09-28|09:41:45\] Database closed                          database=/osm/schnorrmpc/data/gwan/chaindata
"0x733452e4b0b6e0ae2248b0b46918d64bc8771bf2"
INFO \[09-28|09:41:46\] Allocated cache and file handles         database=/osm/schnorrmpc/data/gwan/pos cache=16 handles=256
INFO \[09-28|09:41:46\] Allocated cache and file handles         database=/osm/schnorrmpc/data/gwan/rblocaldb cache=16 handles=256
INFO \[09-28|09:41:46\] Allocated cache and file handles         database=/osm/schnorrmpc/data/gwan/eplocaldb cache=16 handles=256
INFO \[09-28|09:41:46\] Starting peer-to-peer node               instance=gwan/v2.1.5/linux-amd64/go1.13.4
INFO \[09-28|09:41:46\] Allocated cache and file handles         database=/osm/schnorrmpc/data/gwan/chaindata cache=128 handles=8192
INFO \[09-28|09:41:47\] Initialised chain configuration          config="{ChainID: 1 Byzantium: 0 Engine: ethash}"
INFO \[09-28|09:41:47\] Disk storage enabled for ethash caches   dir=/osm/schnorrmpc/data/gwan/wanhash count=3
INFO \[09-28|09:41:47\] Disk storage enabled for ethash DAGs     dir=/root/.wanhash                    count=2
INFO \[09-28|09:41:47\] Initialising Wanchain protocol           versions="\[63 62\]" network=1
INFO \[09-28|09:41:47\] Loaded most recent local header          number=0 hash=0x0376899c001618fc7d5ab4f31cfd7f57ca3a896ccc1581a57d8f129ecf40b840 td=1048576
INFO \[09-28|09:41:47\] Loaded most recent local full block      number=0 hash=0x0376899c001618fc7d5ab4f31cfd7f57ca3a896ccc1581a57d8f129ecf40b840 td=1048576
INFO \[09-28|09:41:47\] Loaded most recent local fast block      number=0 hash=0x0376899c001618fc7d5ab4f31cfd7f57ca3a896ccc1581a57d8f129ecf40b840 td=1048576
INFO \[09-28|09:41:47\] loaded cq cache                          eclapsed=310ns length=0
INFO \[09-28|09:41:47\] Loaded local transaction journal         transactions=0 dropped=0
INFO \[09-28|09:41:47\] Regenerated local transaction journal    transactions=0 accounts=0
INFO \[09-28|09:41:47\] Starting P2P networking
INFO \[09-28|09:41:47\] RLPx listener up                         self="enode://a277dcfd46eaa436b795bdda227eb921ede625fd8560f33781a7ba273decfb4b09f5d41f9abdb3abedb10db15ef5b471b6405228a889e1e6d48faf0e2e9ed848@\[::\]:17717?discport=0"
INFO \[09-28|09:41:47\] IPC endpoint opened: /osm/schnorrmpc/data/gwan.ipc
INFO \[09-28|09:41:49\] IPC endpoint closed: /osm/schnorrmpc/data/gwan.ipc
INFO \[09-28|09:41:49\] Blockchain manager stopped
INFO \[09-28|09:41:49\] Stopping Wanchain protocol
INFO \[09-28|09:41:49\] Wanchain protocol stopped
INFO \[09-28|09:41:49\] Transaction pool stopped
INFO \[09-28|09:41:49\] Database closed                          database=/osm/schnorrmpc/data/gwan/chaindata
INFO \[09-28|09:41:50\] Allocated cache and file handles         database=/osm/schnorrmpc/data/gwan/pos cache=16 handles=256
INFO \[09-28|09:41:50\] Allocated cache and file handles         database=/osm/schnorrmpc/data/gwan/rblocaldb cache=16 handles=256
INFO \[09-28|09:41:50\] Allocated cache and file handles         database=/osm/schnorrmpc/data/gwan/eplocaldb cache=16 handles=256
INFO \[09-28|09:41:50\] Starting peer-to-peer node               instance=gwan/v2.1.5/linux-amd64/go1.13.4
INFO \[09-28|09:41:50\] Allocated cache and file handles         database=/osm/schnorrmpc/data/gwan/chaindata cache=128 handles=8192
INFO \[09-28|09:41:50\] Initialised chain configuration          config="{ChainID: 1 Byzantium: 0 Engine: ethash}"
INFO \[09-28|09:41:50\] Disk storage enabled for ethash caches   dir=/osm/schnorrmpc/data/gwan/wanhash count=3
INFO \[09-28|09:41:50\] Disk storage enabled for ethash DAGs     dir=/root/.wanhash                    count=2
INFO \[09-28|09:41:50\] Initialising Wanchain protocol           versions="\[63 62\]" network=1
INFO \[09-28|09:41:50\] Loaded most recent local header          number=0 hash=0x0376899c001618fc7d5ab4f31cfd7f57ca3a896ccc1581a57d8f129ecf40b840 td=1048576
INFO \[09-28|09:41:50\] Loaded most recent local full block      number=0 hash=0x0376899c001618fc7d5ab4f31cfd7f57ca3a896ccc1581a57d8f129ecf40b840 td=1048576
INFO \[09-28|09:41:50\] Loaded most recent local fast block      number=0 hash=0x0376899c001618fc7d5ab4f31cfd7f57ca3a896ccc1581a57d8f129ecf40b840 td=1048576
INFO \[09-28|09:41:50\] loaded cq cache                          eclapsed=340ns length=0
INFO \[09-28|09:41:50\] Loaded local transaction journal         transactions=0 dropped=0
INFO \[09-28|09:41:50\] Regenerated local transaction journal    transactions=0 accounts=0
INFO \[09-28|09:41:50\] Starting P2P networking
INFO \[09-28|09:41:50\] RLPx listener up                         self="enode://a277dcfd46eaa436b795bdda227eb921ede625fd8560f33781a7ba273decfb4b09f5d41f9abdb3abedb10db15ef5b471b6405228a889e1e6d48faf0e2e9ed848@\[::\]:17717?discport=0"
INFO \[09-28|09:41:50\] IPC endpoint opened: /osm/schnorrmpc/data/gwan.ipc
INFO \[09-28|09:41:50\] IPC endpoint closed: /osm/schnorrmpc/data/gwan.ipc
INFO \[09-28|09:41:50\] Blockchain manager stopped
INFO \[09-28|09:41:50\] Stopping Wanchain protocol
INFO \[09-28|09:41:50\] Wanchain protocol stopped
INFO \[09-28|09:41:50\] Transaction pool stopped
INFO \[09-28|09:41:50\] Database closed                          database=/osm/schnorrmpc/data/gwan/chaindata
 !!!!!!!!!!!!!!! Important !!!!!!!!!!!!!!!
\==================================================
      Please Backup Your Validator Address
      "0x733452e4b0b6e0ae2248b0b46918d64bc8771bf2"
\==================================================
      Please Backup Your Validator Public Key
0x2d54ecef44b32fa8b7c6e8c1c4e64e2fbc96c98ee027cd7032f53d89a97be3c0a9a10377c9dc688be2b594000d0e914abbf11b8a476b63c0a6ab2be4a64c3792
\==================================================
      Please Backup Your Keystore JSON String{"address":"733452e4B0B6E0AE2248B0b46918d64BC8771BF2","crypto":{"cipher":"aes-128-ctr","ciphertext":"c6d8fbe6a885b8471f4c22835db0cbac7fbfe0c9f2f397d1eadd9840e9e5d4f3","cipherparams":{"iv":"8d569d4c96d6ddd69de9a3f8a36a4216"},"kdf":"scrypt","kdfparams":{"dklen":32,"n":262144,"p":1,"r":8,"salt":"2f0c2c117891a3e9f26766b591a6998c1cfeb2aff9e411f301743d9bd1da7bdb"},"mac":"93bf267476286be3b8296d665107f412c1f7eae56afc4fce9a78ca28bdeb4693"},"crypto2":{"cipher":"aes-128-ctr","ciphertext":"129e452adbd5bbd2ba9ae6bea7b54641e6c32064cb25d813dc62debbe4335070","cipherparams":{"iv":"736febbacaf06e4e61c1d0cf8010f8e6"},"kdf":"scrypt","kdfparams":{"dklen":32,"n":262144,"p":1,"r":8,"salt":"88e483a2fce18c6efc289111f70010fd6833fe9d579069902ae827c109017766"},"mac":"a894cd1b61a6ab7d92d53da3ed9da07c7d6ddb83d29212f4ca44ad55468c0cdb"},"id":"7cb62af2-d704-4d09-9c80-85cfa309ca82","version":3,"waddress":"022d54ecef44b32fa8b7c6e8c1c4e64e2fbc96c98ee027cd7032f53d89a97be3c00315a46e2648cbf3adc080987846b030f3dbda9a3c9af1e753333ba185c6689511"}==================================================
      Please Backup Your Nodekey String6c99ddaaa5664bf8a0c36647b1a1a99dedb7f821415f6b6eeee9c1e60ac9d76b==================================================
      Please Backup Your EnodeId String0xa277dcfd46eaa436b795bdda227eb921ede625fd8560f33781a7ba273decfb4b09f5d41f9abdb3abedb10db15ef5b471b6405228a889e1e6d48faf0e2e9ed848
Please properly back up information above such as Public Key, Keystore, Nodekey and EnodeID after running scripts.
---
# Agent Instructions
This documentation is published with GitBook. GitBook is the documentation platform designed so that both humans and AI agents can read, navigate, and reason over technical content effectively. Learn more at gitbook.com.
## Querying This Documentation
If you need additional information that is not directly available in this page, you can query the documentation dynamically by asking a question.
Perform an HTTP GET request on the current page URL with the `ask` query parameter, and the optional `goal` query parameter:
```
GET https://docs.wanchain.org/wanchain-bridge-nodes/deploy-a-bridge-node/deploy-a-bridge-node-via-xstake-recommended.md?ask=&goal=
```
`ask` is the immediate question: it should be specific, self-contained, and written in natural language.
`goal` is optional and describes the broader end goal you are ultimately trying to accomplish on behalf of the user. GitBook uses it to tailor the answer towards what is most useful for that goal.
The response will contain a direct answer to the question and relevant excerpts and sources from the documentation.
Use this mechanism when the answer is not explicitly present in the current page, you need clarification or additional context, or you want to retrieve related documentation sections.