> For the complete documentation index, see [llms.txt](https://docs.wanchain.org/llms.txt). Markdown versions of documentation pages are available by appending `.md` to page URLs; this page is available as [Markdown](https://docs.wanchain.org/wallet-and-tools/metamask.md).
# MetaMask

On April 15, 2021, Wanchain completed a major upgrade to the Jupiter version. So far, Wanchain has achieved full compatibility with the EVM. Therefore, MetaMask, the most popular browser plug-in wallet on Ethereum, can also connect to Wanchain (including the support of Ledger and Trezor hardware wallets).
For MetaMask to connect to Wanchain, we provide two configuration methods.
## Method 1: Quick configuration
Using the functions provided by the [chainlist.org](https://chainlist.org) website,you can quickly add the Wanchain network to the MetaMask browser plug-in wallet.
First, open [https://chainlist.org](https://chainlist.org) in Chrome.
Enter **Wanchain** in the search box above

Then click the **Connect Wallet** button below to connect to MetaMask.
Then click the **Add To Metamask** button to complete the add the Wanchain network.

After completing the adding, you can select MetaMask wallet in Wanchain's Dapps.
## Method 2: Manual configuration
### Connect to Wanchain mainnet
Click the network menu at the top of the MetaMask page, and select the **Custom RPC** at the bottom of the pop-up menu.

Then fill in the RPC information as shown in the figure below, and click the **Save** button:

```
Network Name: Wanchain
New RPC URL: https://gwan-ssl.wandevs.org:56891
Chain ID:888
Currency Symbol: WAN
Block Explorer URL: https://www.wanscan.org
```
After adding, you can use MetaMask to connect to the Wanchain mainnet to send transactions.
### Connect to Wanchain test network
Click the network menu at the top of the MetaMask page, and select the **Custom RPC** at the bottom of the pop-up menu.

Then fill in the RPC information as shown in the figure below, and click the **Save** button:

```
Network Name: Wanchain
New RPC URL: https://gwan-ssl.wandevs.org:46891
Chain ID: 999
Currency Symbol: WAN
Block Explorer URL: https://testnet.wanscan.org
```
After adding, you can use MetaMask to connect to the Wanchain testnet to send transactions.
## How to crosschain your assets using WanBridge Web
**Step 0: Make sure you have the appropriate wallets.**
Before completing decentralised crosschain transactions using WanBridge Web, you need to ensure you have access to the correct wallet(s). You must have wallets for each network involved in the crosschain transaction. In other words, if you are moving $BTC from Bitcoin to Ethereum, you need to use Bitcoin and Ethereum wallets. Similarly, if you are moving $LTC from Wanchain to Moonriver, you need Wanchain- and Moonriver-compatible wallets.
This guide demonstrates a crosschain transaction moving $ETH from Ethereum to Wanchain and uses [Metamask](https://metamask.io/). [Metamask](https://metamask.io/) is a fantastic wallet that grants you access to any EVM-compatible blockchain network.
[Download Metamask here](https://metamask.io/).
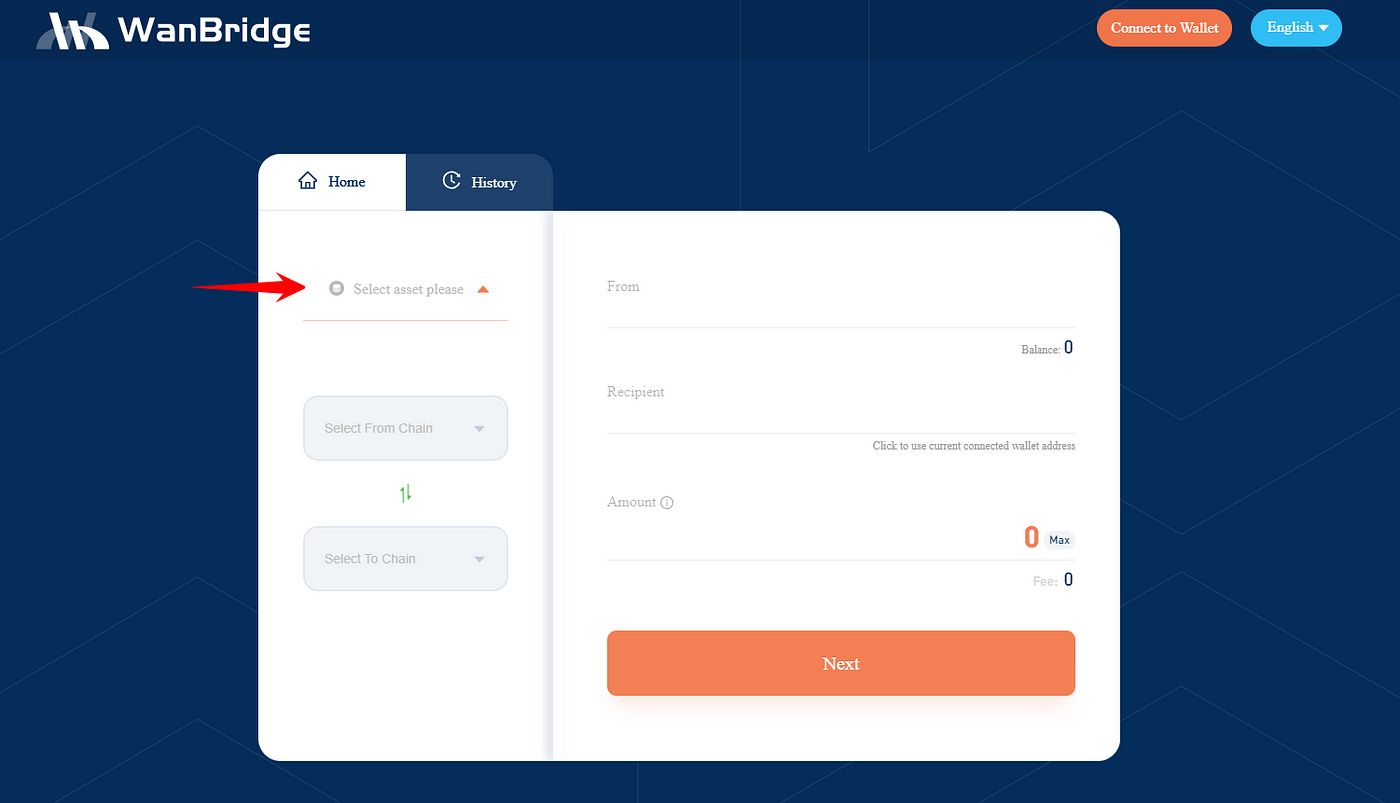
**Step 1: Visit** [**https://bridge.wanchain.org/**](https://bridge.wanchain.org/#/)
**Step 2:** Click “**Select asset please**” on the left side of the terminal.
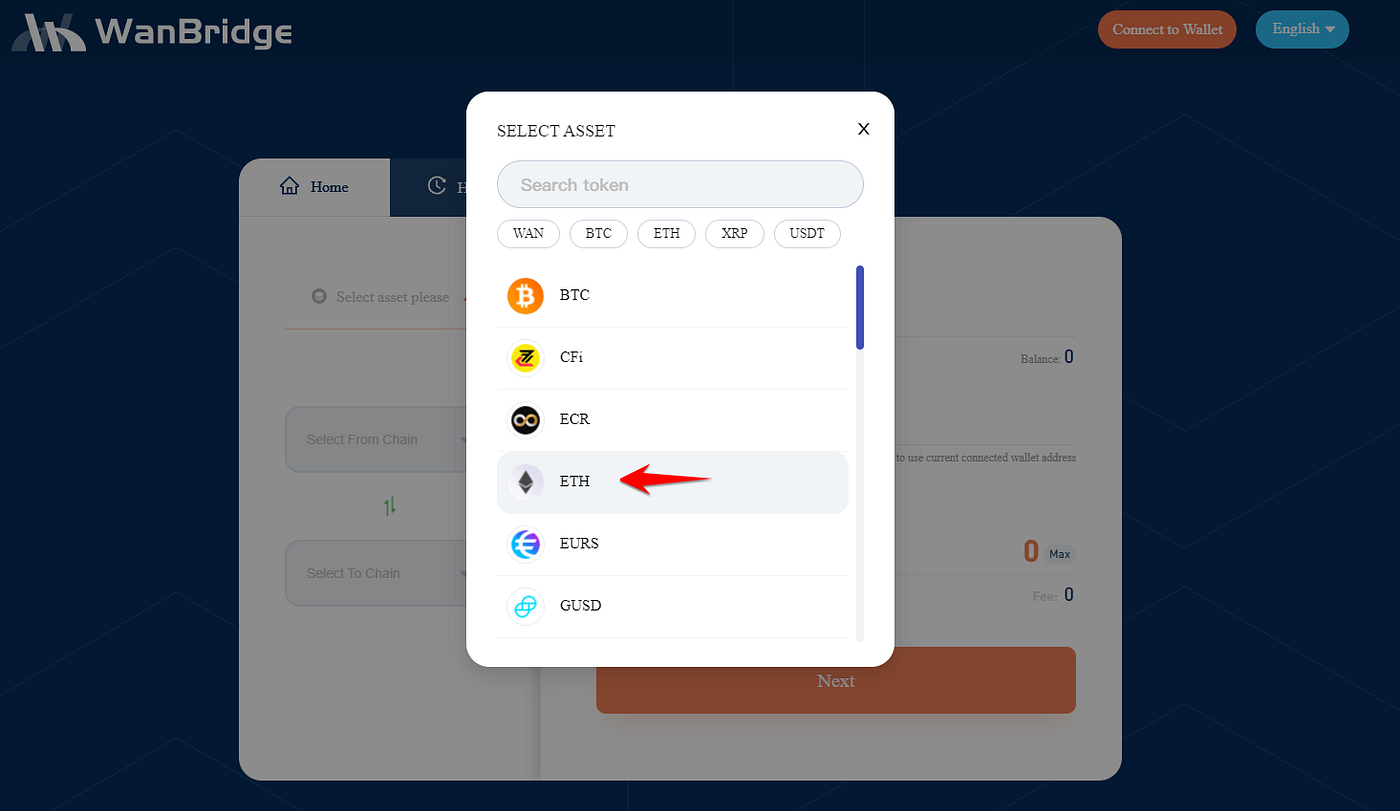
**Step 3:** Select the asset you want to move crosschain from one blockchain network to another.
In this example, we select $ETH because we are moving $ETH.
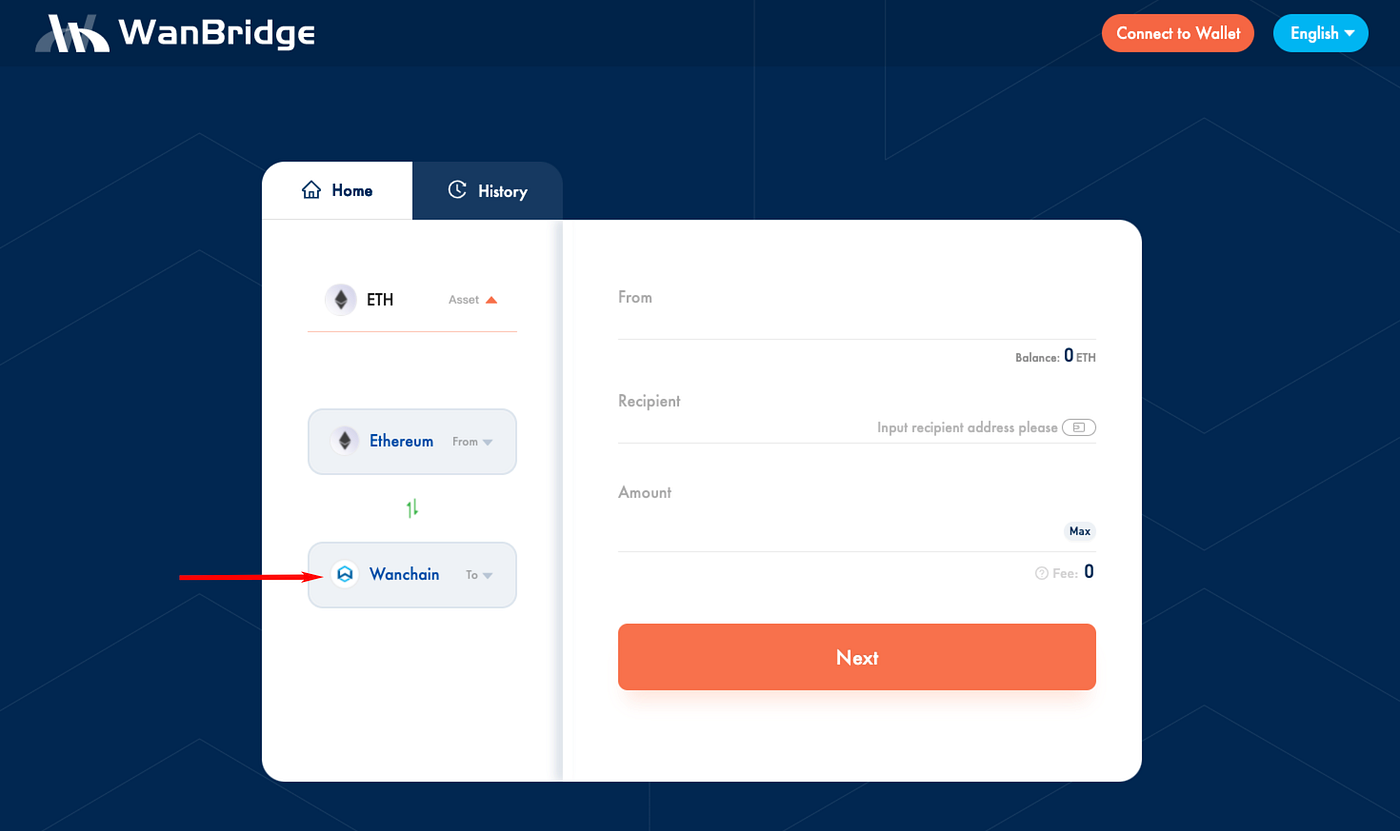
**Step 4:** Click “**Select From Chain**” and select the origin chain.
In this example, the origin chain is Ethereum because the $ETH is currently on Ethereum.

**Step 5:** Click “**Select To Chain**” and select the destination chain.
In this example, we are moving $ETH to Wanchain. So, Wanchain is the destination chain.
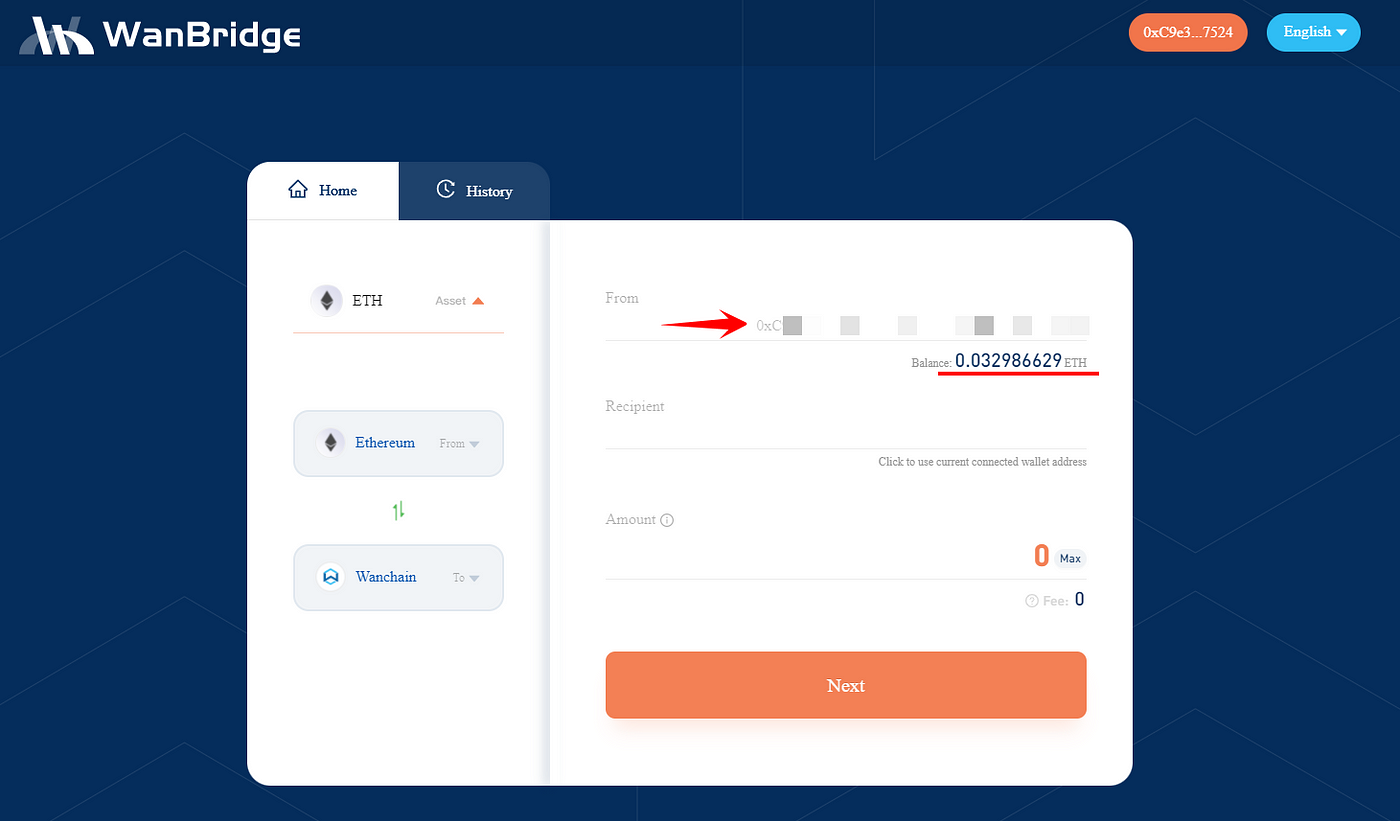
**Step 6.** Click “**Connect to Wallet**” in the top right corner of the window.
**Step 7:** Select the appropriate wallet.
In this example, we are using [MetaMask](https://metamask.io/) connected to the Ethereum network.

When connecting [Metamask](https://metamask.io/) for the first time, you will need to click **connect** in the [Metamask](https://metamask.io/) pop-up window. Your Ethereum wallet address will now be connected to [WanBridge Web](https://bridge.wanchain.org/#/). Your ETH balance should also be visible.
**Step 8:** Enter your recipient address. This is the address that you want to send your assets to on the destination chain.
In this example, as we are moving $ETH to Wanchain, the **Recipient** address is a Wanchain address.
**Step 9:** Enter the amount you wish to convert and then click “**Next**”.
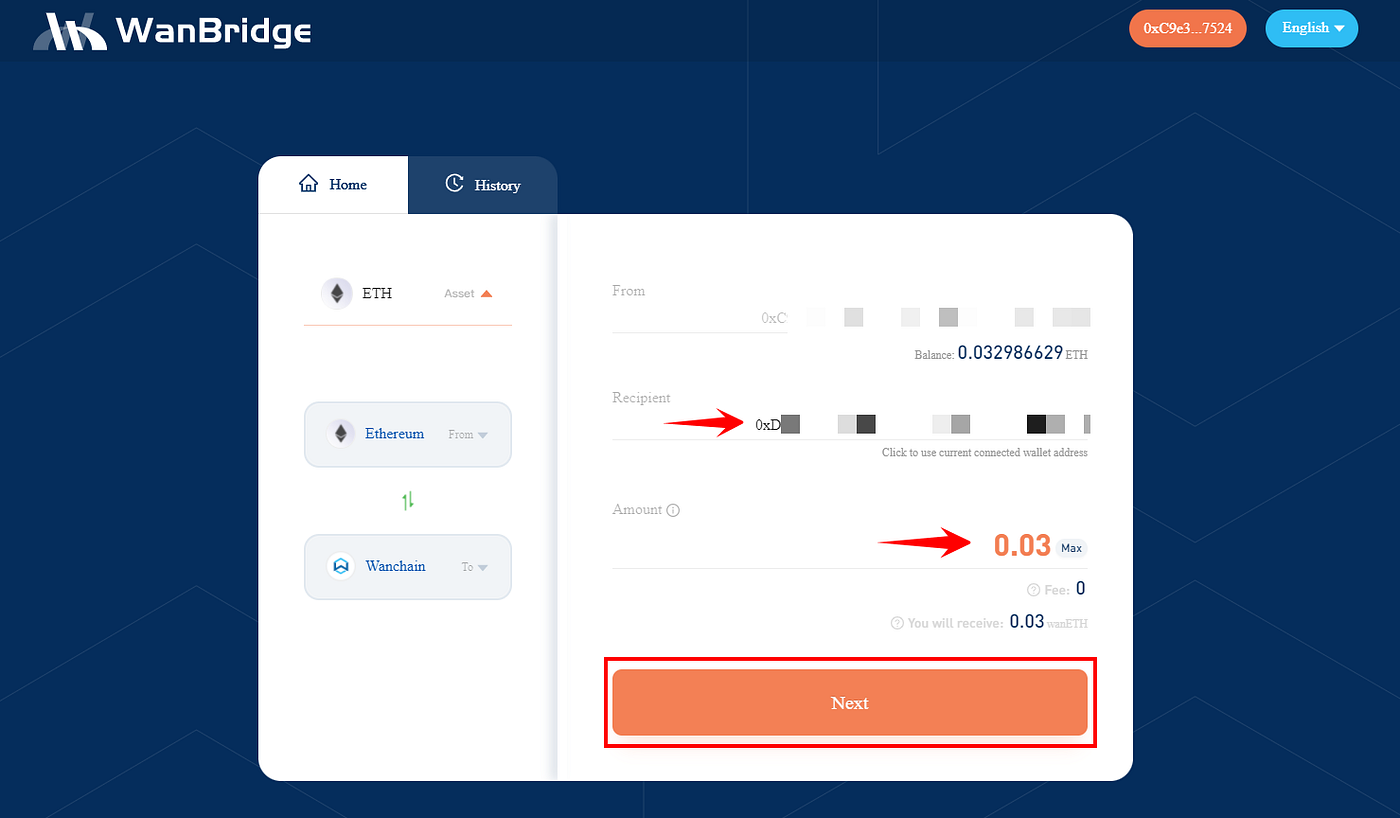
**Step 10:** On the next page, review all the information relating to your crosschain transaction and click “**Confirm**”.

Be sure to double check your **To** address and the **Amount** you are sending crosschain. When using Metamask, you will also need to confirm the transaction in the MetaMask pop-up window. Make sure to use an appropriate gas fee to ensure your ETH transaction doesn’t get delayed.
**Step 11:** Wait.
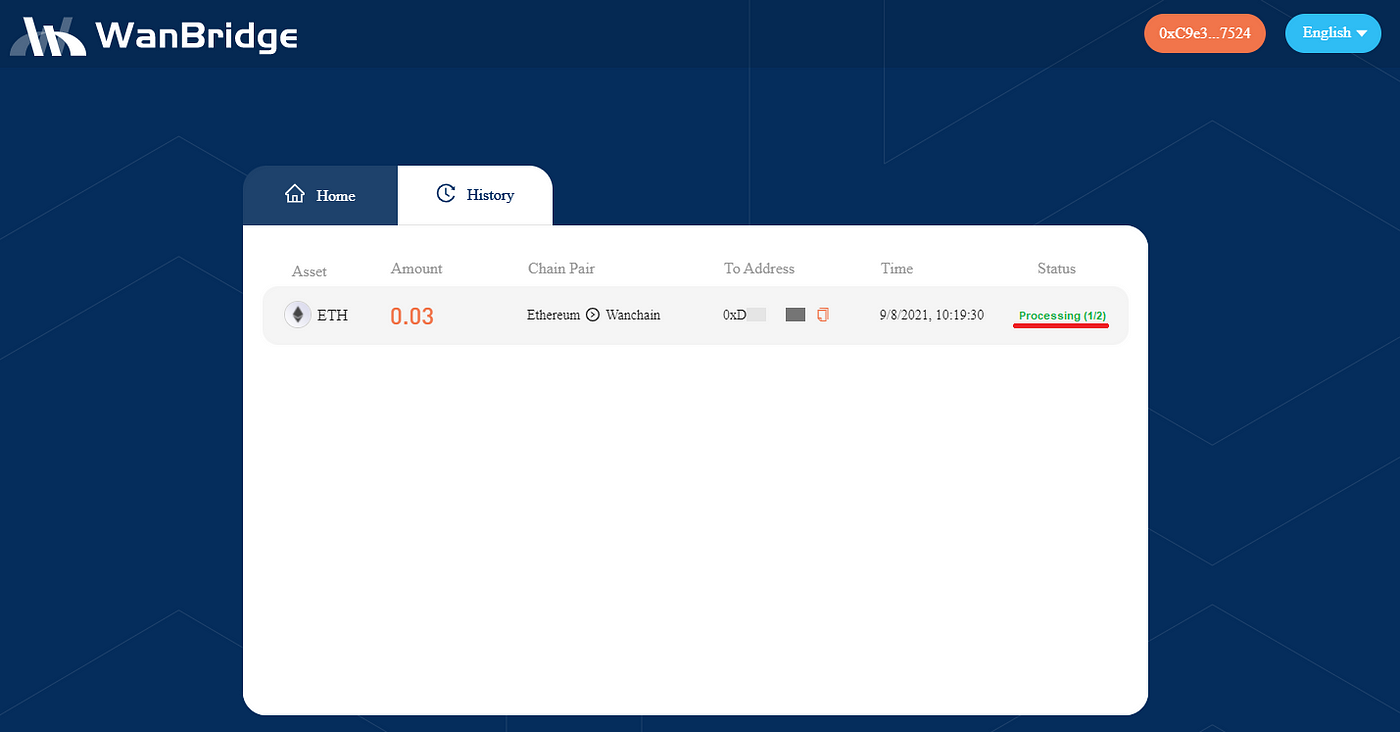
Your crosschain transaction is now being processed. It will appear as **Processing**. The amount of time a crosschain transaction takes is entirely depending on the speed of the blockchain networks involved. For example, an $XRP transaction from XRP Ledger to Avalanche might only take a few minutes while a $BTC transaction from Bitcoin to Binance Smart Chain could take an hour.
**Step 12:** Confirm the receipt of your funds.
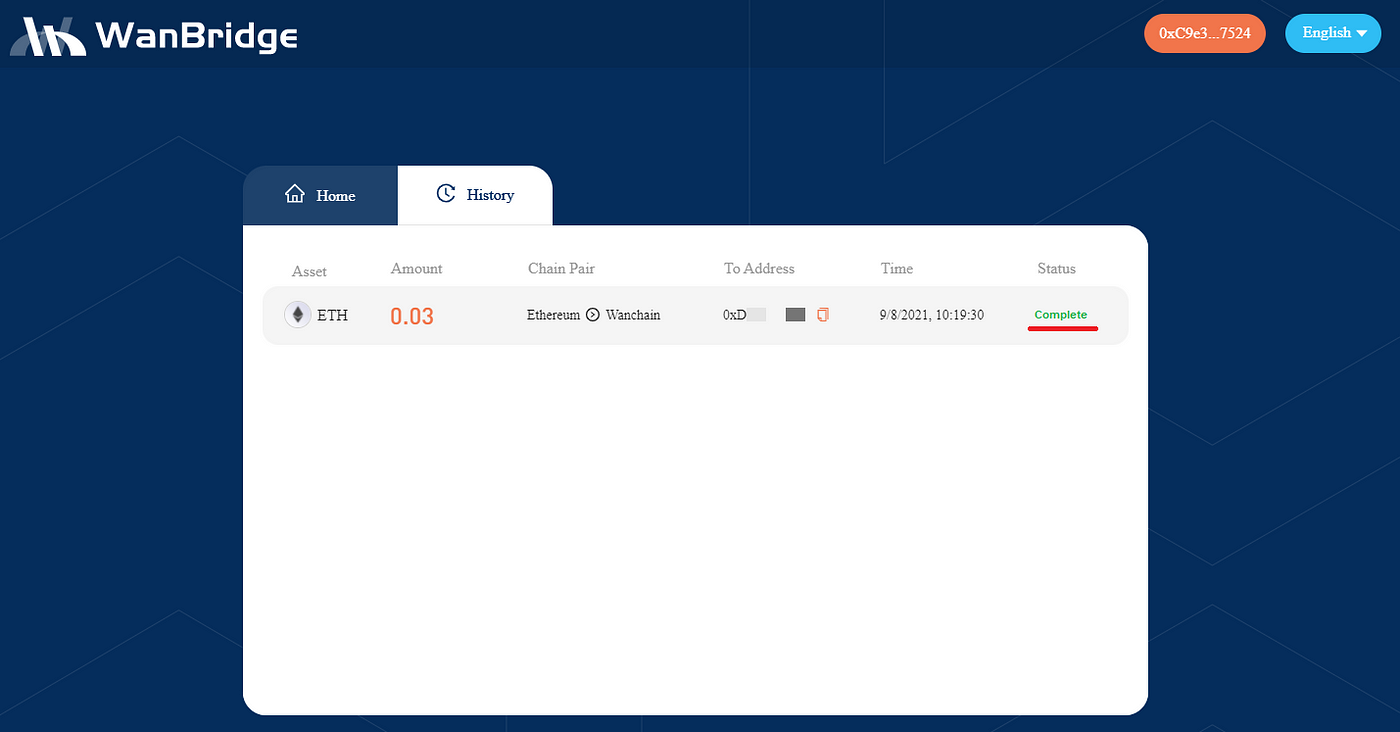
Once your crosschain transaction status changes to **Complete**, you can confirm receipt of funds in your **Recipient** address. In this example, the **Recipient** Wanchain address now has $wanETH.
Congratulations! You have completed a crosschain transaction using Wanbridge Web!
*Note: Crosschain assets use different nomenclature depending on the destination chain. Assets moved to Wanchain use the ‘wan’ prefix (ie. ETH becomes wanETH, XRP becomes wanXRP, etc.). Crosschain assets on different blockchain networks may use a slightly different naming scheme. For instance, crosschain assets on Avalanche use the ‘.a’ suffix (ie. BTC becomes BTC.a, WAN becomes WAN.a).*
---
# Agent Instructions
This documentation is published with GitBook. GitBook is the documentation platform designed so that both humans and AI agents can read, navigate, and reason over technical content effectively. Learn more at gitbook.com.
## Querying This Documentation
If you need additional information that is not directly available in this page, you can query the documentation dynamically by asking a question.
Perform an HTTP GET request on the current page URL with the `ask` query parameter:
```
GET https://docs.wanchain.org/wallet-and-tools/metamask.md?ask=
```
The question should be specific, self-contained, and written in natural language.
The response will contain a direct answer to the question and relevant excerpts and sources from the documentation.
Use this mechanism when the answer is not explicitly present in the current page, you need clarification or additional context, or you want to retrieve related documentation sections.