> For the complete documentation index, see [llms.txt](https://docs.wanchain.org/llms.txt). Markdown versions of documentation pages are available by appending `.md` to page URLs; this page is available as [Markdown](https://docs.wanchain.org/guide/bridge-node-delegation-guide.md).
# Bridge Node Delegation Guide
An in-depth guide outlining how to delegate your $WAN to a Wanchain Bridge (Storeman) Node to earn rewards with no risk of impermanent loss! This guide will focus on the [Wanchain Desktop Wallet](https://www.wanchain.org/wanwallet).
**Before we start, what is a Wanchain Bridge Node? And is it safe to delegate your $WAN?**
Wanchain Bridge Nodes, also called Storeman Nodes, are at the core of Wanchain's cross chain technology. Bridge Nodes are nodes that verify cross chain transactions and ensure the smooth and secure transfer of value between heterogeneous blockchains.
Delegating to a Bridge Node is very safe; your $WAN never leaves your custody. When you delegate your $WAN, your $WAN is locked in a smart contract. Even if the Bridge Node you chose to delegate to ends up going offline, you will still be able to claim your $WAN and return your coins to your wallet address.
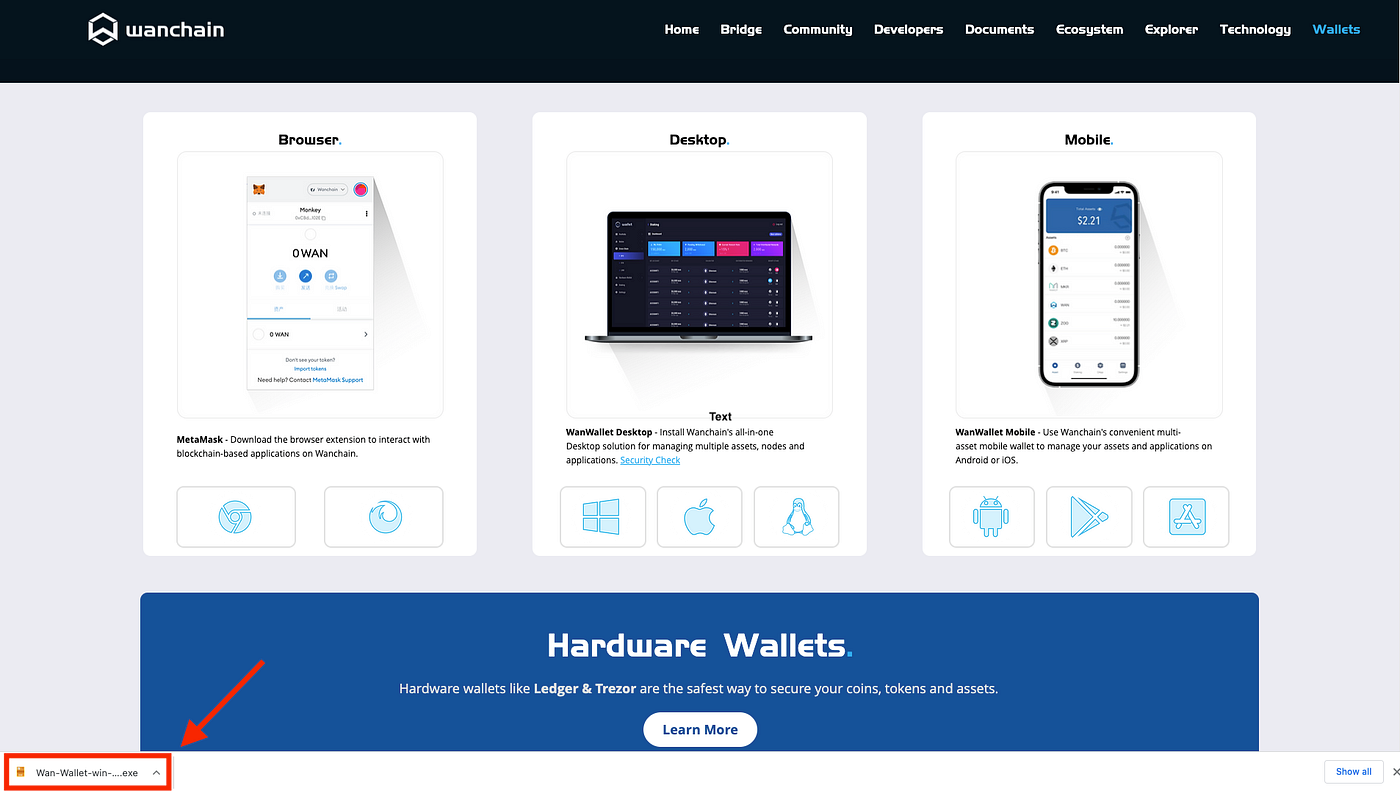
## Step 1. Install the Wanchain Desktop Wallet
You need to [install the Wanchain Desktop Wallet](https://www.wanchain.org/wanwallet). Be sure to download and install the right version for your operating system.

Click the Windows, Mac, or Linux button.
This will initiate a download.
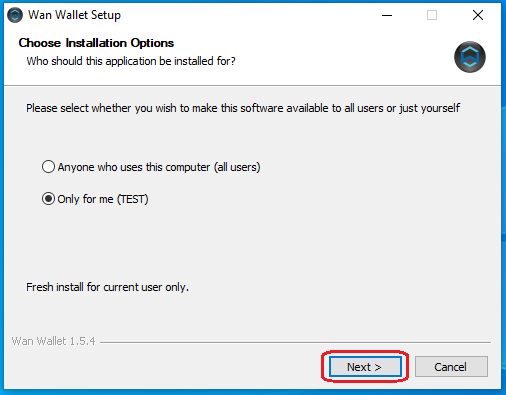
Click “OK” to begin the download then initiate the installation.
Be sure to follow the directions as prompted.
Select an option then click “Next”.
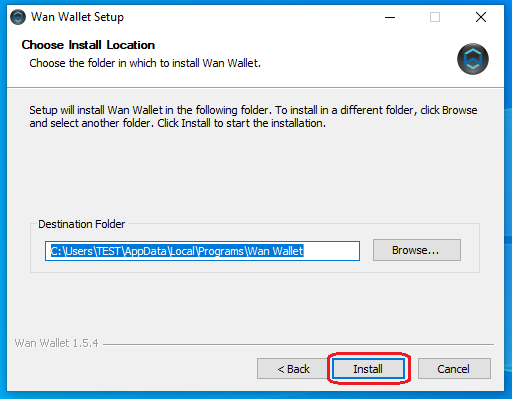
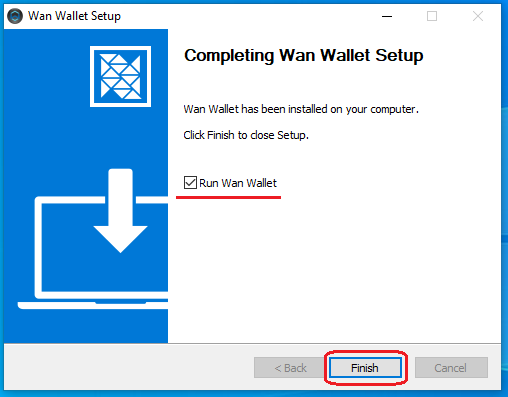
Click “Install” then wait for the installation to complete.
Check the “Run Wan Wallet” box then click “Finish”.
Your Wanchain Desktop Wallet should open automatically.
Set a strong password of your choice.
Make sure you have the “**Create Phrase**” option selected. You can read the password requirements by hovering over “**i**” as shown below.

### Click “Next” once you have backed up your seed words.
This step is very important! You need to carefully write down your 12 seed words, in order, on a piece of paper. **Saving them digitally is unsafe**. Best practice is to make multiple copies of your seed words and keep them in different secure locations.
> Note: Your seed words are the keys to your wallet. Never share them with anyone under any circumstances. Scammers can steal your funds if they have your seed words. ***Keep them safe***!
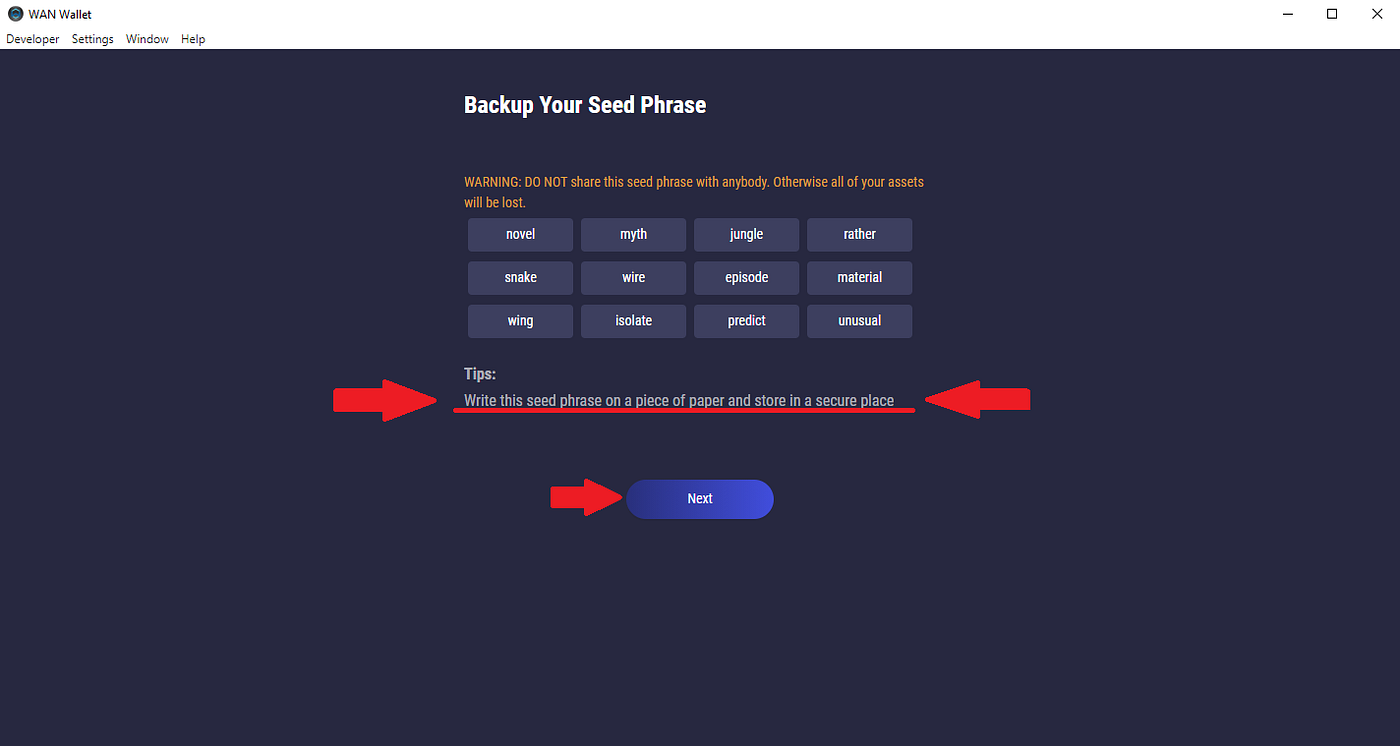
Input your seed words in order by clicking the words then click “Done”.
This is to confirm your seed words were written down correctly. If you make a mistake here, you can click “Previous” to go back and try again.

Congratulations! Your wallet has now been set up successfully set up!

## Step 2. Fund your $WAN account
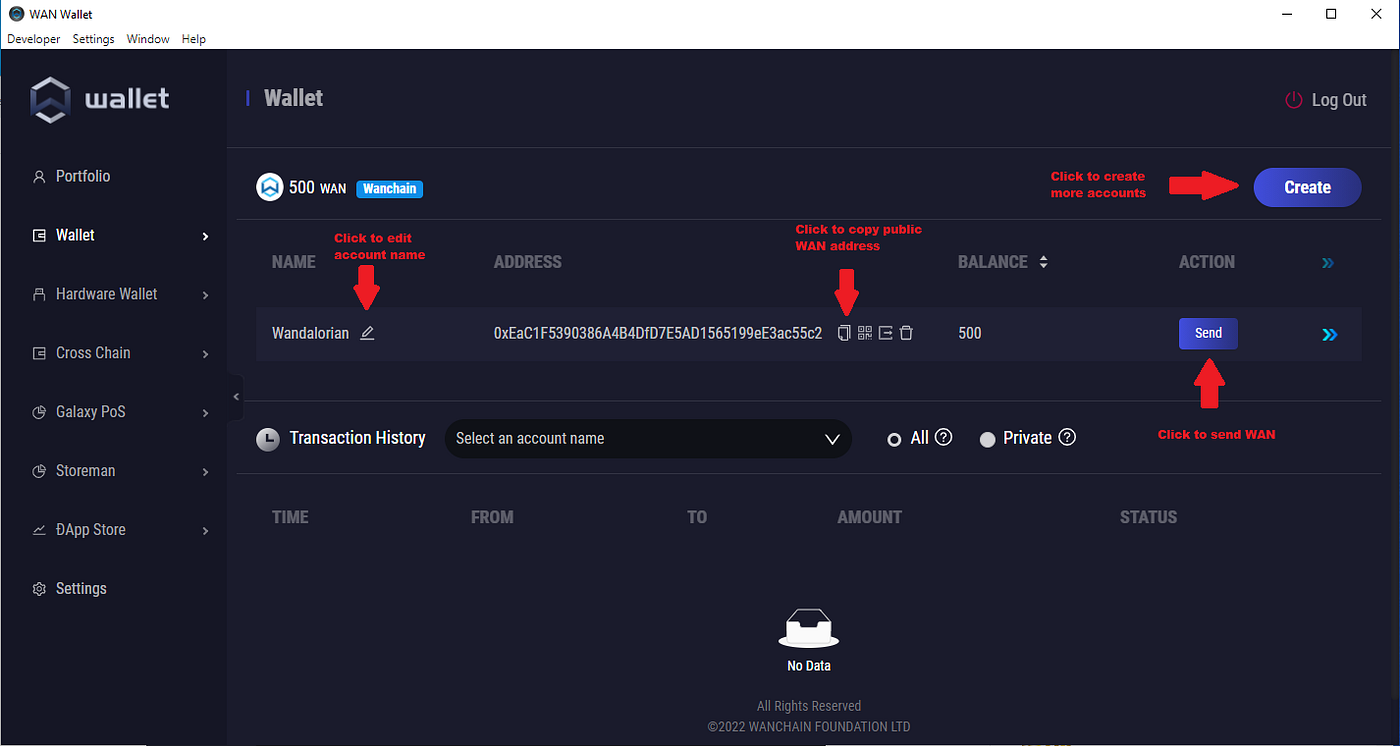
View your $WAN account overview.
Use the menu on the left to navigate to **Wallet → WAN → Wanchain**, as in the screenshot below.

Fund your account with some $WAN.
From your $WAN account overview, you can edit your account name, create more wallets, copy your public address and send $WAN to other addresses.
**You’ll need at least 100 $WAN for delegating and some extra for gas (0.1 $WAN).**
> Note: You can buy $WAN on any of these [markets](https://coinmarketcap.com/currencies/wanchain/markets/). Alternatively, you crosschain some assets using [Wanchain’s crosschain bridge](https://bridge.wanchain.org/#/) thens get some $WAN on [WanSwap](https://www.wanswap.finance/#/swap). All crosschain transactions are eligible to automatically receive a bit of $WAN from Wanchain’s [universal crosschain faucet](https://medium.com/wanchain-foundation/interoperable-defi-made-easy-wan-cross-chain-faucet-now-supports-all-tokens-e68be483739).
## Step 3. Delegating $WAN to a Bridge (Storeman) Node
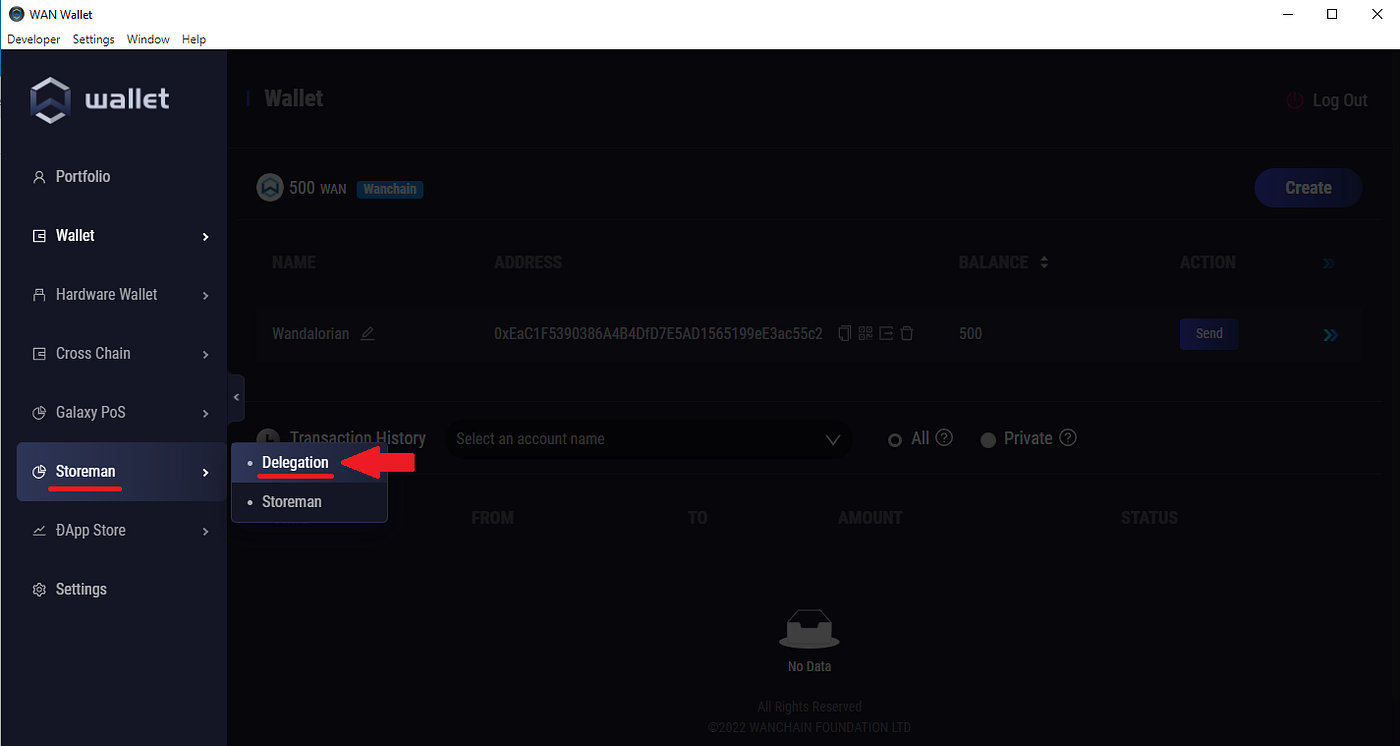
View your Delegation overview.
Once you have deposited some $WAN on your address, use the menu on the left to navigate to **Storeman → Delegation**, as in the screenshot below.
Click “New Delegation”.
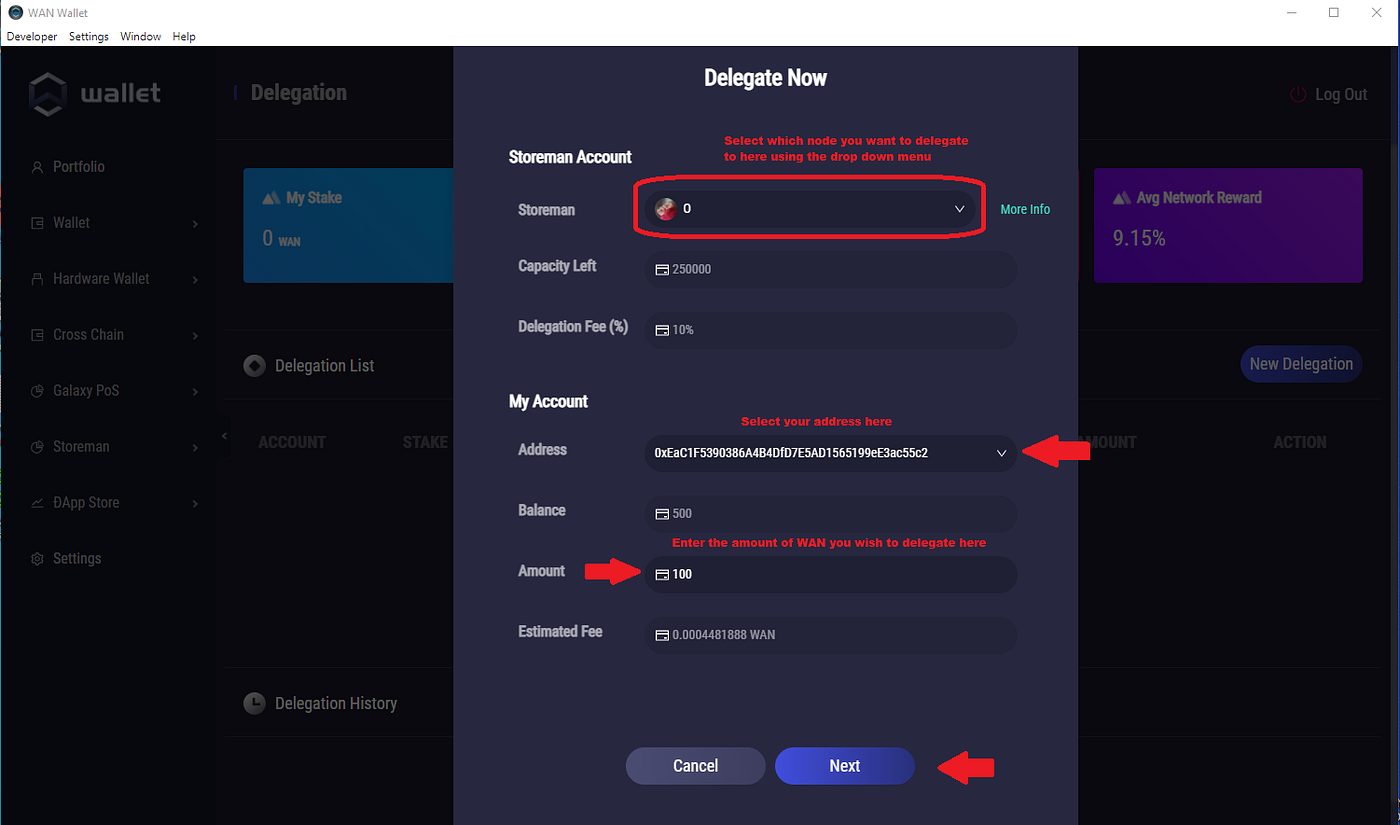
This will cause a pop-up window to appear.

Select a node from the Storeman drop-down list, select your address on the address list, input the amount of $WAN you wish to stake then click “Next”.
As in the screenshot below.
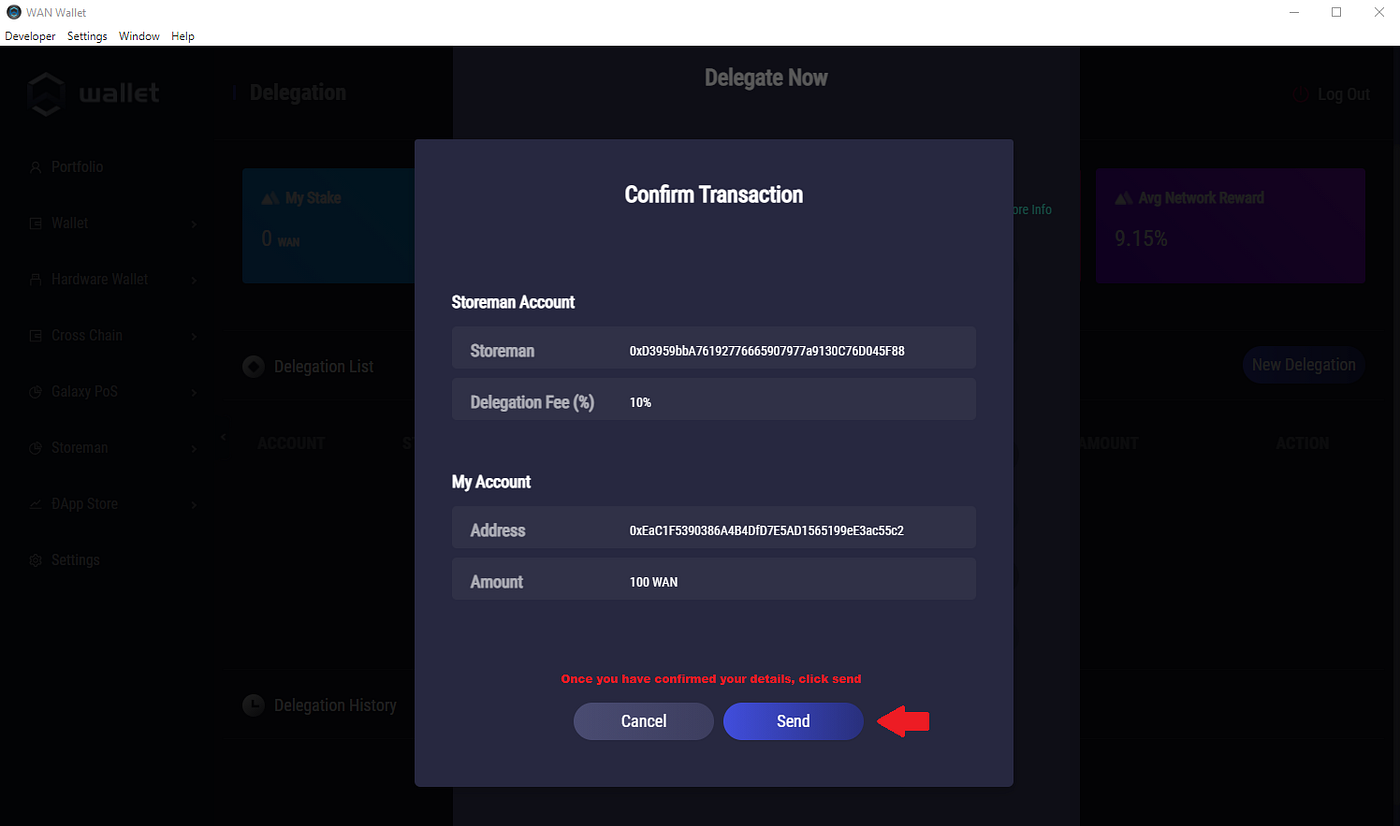
After confirming your details, click “Send” to start delegating your $WAN to the Bridge (Storeman) Node you selected.
As in the screenshot below.
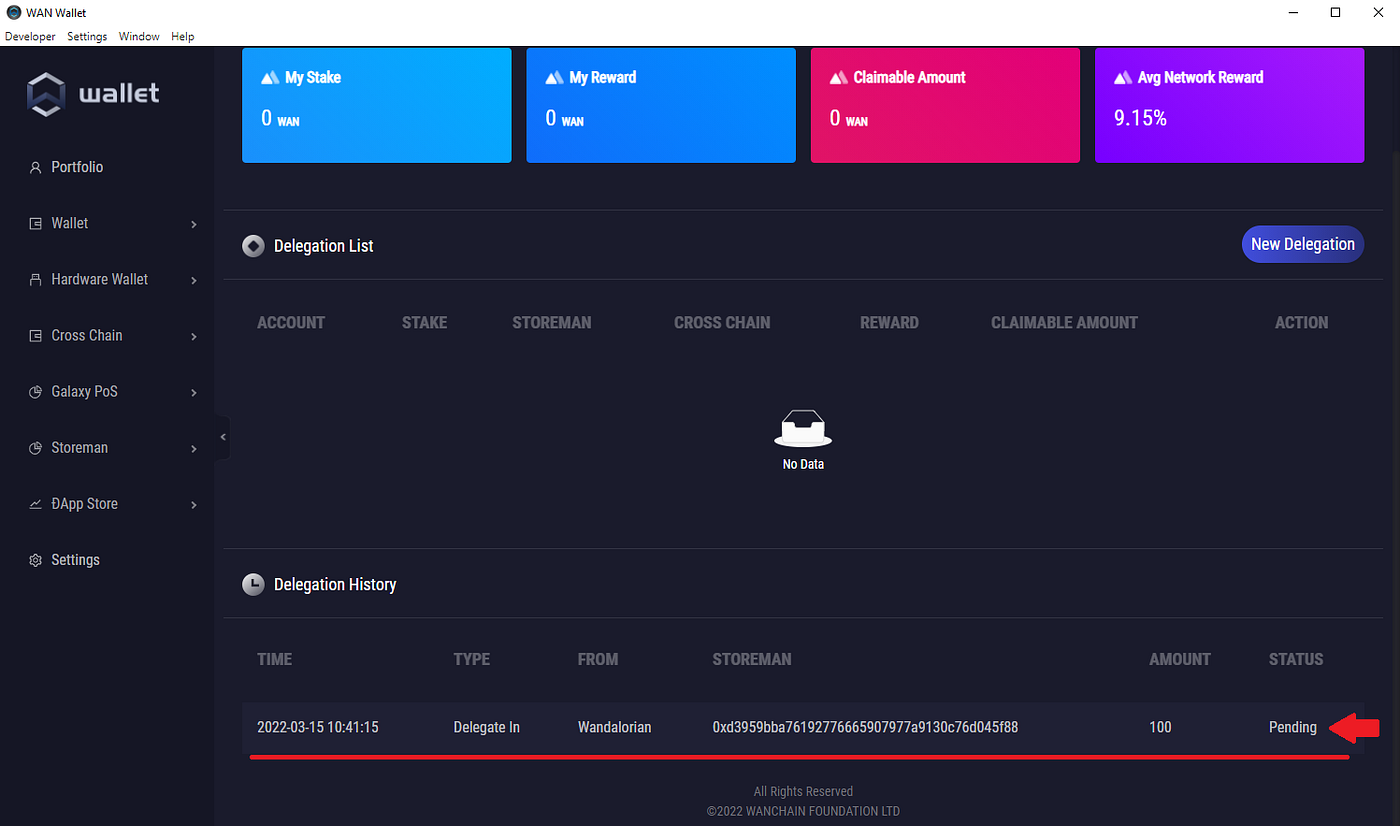
Wait a few minutes for the status below to change from “Pending” to “Success”.
You will see your delegation under the Delegation History section below.
You should now see your staked $WAN listed in the “**My Stake**” box. Your cumulative rewards will be displayed in the “**My Reward**” box as you earn them. “**Claimable Amount**” shows the amount of $WAN rewards you can claim. “**Avg Network Reward**” shows the current expected APR.
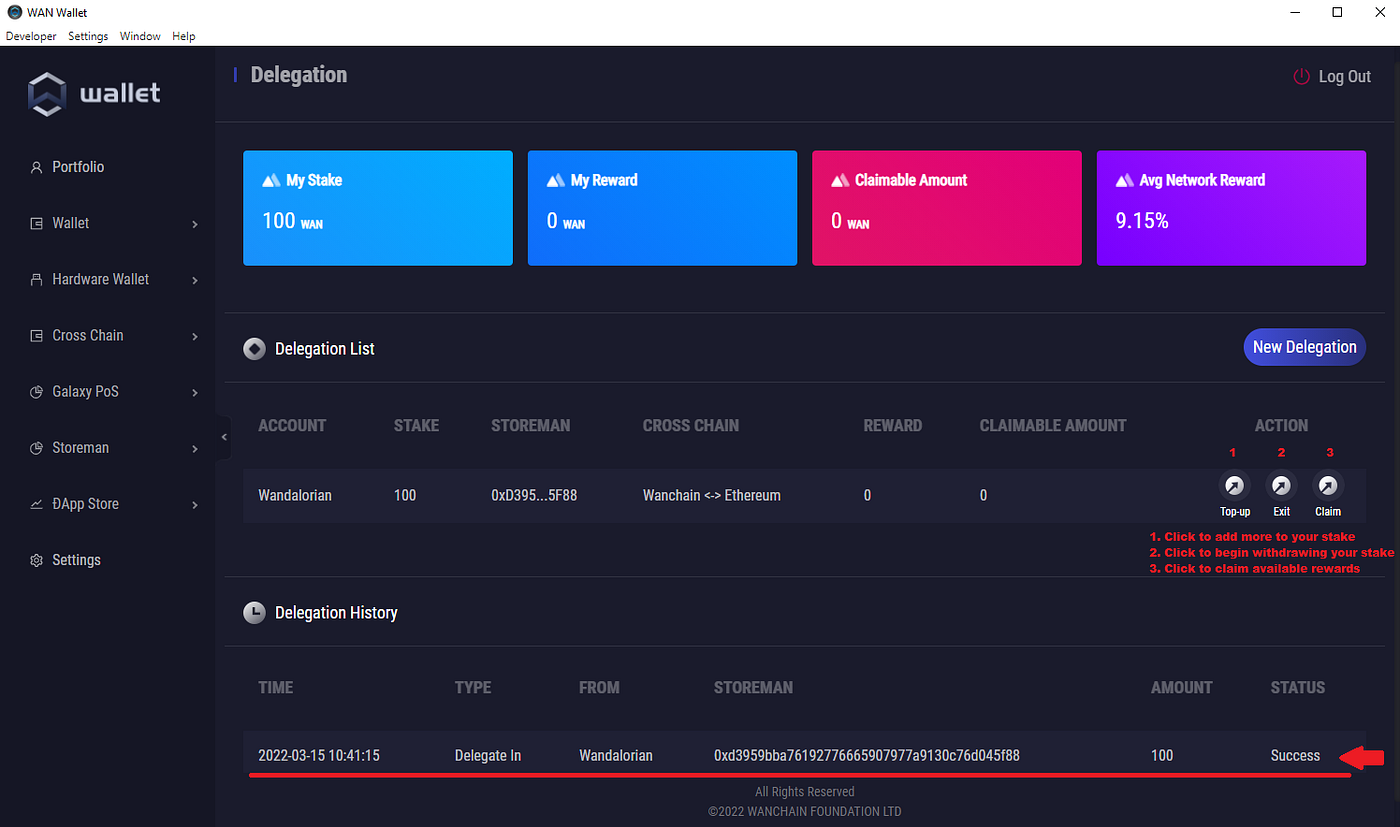
As shown in the screenshot above, you can click “**Top-up**” to add more $WAN to your delegation. Click “**Exit**” to withdraw your staked $WAN and “**Claim**” to claim your $WAN rewards. You can also click “**New Delegation**” if you wish to start a new delegation to a different Bride (Storeman) Node.
### Other important details
* You can claim your $WAN rewards every day.
* You can **top up** your stake at **any time** during the Bridge (Storeman) Group work cycle.
* You can initiate the withdrawal of your original stake at any time. However, it will only be returned once the current Bridge (Storeman) Node Group work cycle is finished. **Work cycles typically run from around the 10th to the 10th of the following month**.
* If you want to initiate the withdrawal of your original stake, you need to click “**Exit**” before the end of the current calendar month. Your $WAN will then be claimable once the current Bridge (Storeman) Node Group work cycle is finished (around the 10th day of the following month). If you do not click “Exit”, your staked WAN will simply continue to earn rewards. Once you have clicked “Exit” and waited for the current Bridge (Storeman) Node Group work cycle to finish, you need to click “**Claim**” for your $WAN to be returned to your original wallet.
## Need help?
Join our [Telegram Tech Support](https://t.me/WanchainSupport) channel. Our support team is standing by and happy to help!
> Note: If you receive a DM offering help, block them immediately. Admins will never DM you first! Never share your seed words with anyone, period.
---
# Agent Instructions
This documentation is published with GitBook. GitBook is the documentation platform designed so that both humans and AI agents can read, navigate, and reason over technical content effectively. Learn more at gitbook.com.
## Querying This Documentation
If you need additional information that is not directly available in this page, you can query the documentation dynamically by asking a question.
Perform an HTTP GET request on the current page URL with the `ask` query parameter, and the optional `goal` query parameter:
```
GET https://docs.wanchain.org/guide/bridge-node-delegation-guide.md?ask=&goal=
```
`ask` is the immediate question: it should be specific, self-contained, and written in natural language.
`goal` is optional and describes the broader end goal you are ultimately trying to accomplish on behalf of the user. GitBook uses it to tailor the answer towards what is most useful for that goal.
The response will contain a direct answer to the question and relevant excerpts and sources from the documentation.
Use this mechanism when the answer is not explicitly present in the current page, you need clarification or additional context, or you want to retrieve related documentation sections.