> For the complete documentation index, see [llms.txt](https://docs.wanchain.org/llms.txt). Markdown versions of documentation pages are available by appending `.md` to page URLs; this page is available as [Markdown](https://docs.wanchain.org/guide/crosschain-transaction-guide-evm-compatible-networks.md).
# Crosschain Transaction Guide (EVM-compatible networks)
An in-depth guide outlining how to complete a crosschain transaction between EVM-compatible networks using both the [Wanchain Desktop Wallet](https://www.wanchain.org/wanwallet) and the [WanBridge web portal](https://bridge.wanchain.org/#/).
This guide will demonstrate two separate crosschain transactions:
1. $ETH from Wanchain to Ethereum using the [Wanchain Desktop Wallet](https://www.wanchain.org/wanwallet)
2. $AVAX from Avalanche to Wanchain using the [WanBridge web portal](https://bridge.wanchain.org/#/) with Metamask
> Note: All crosschain transactions between EVM networks follow the same process. This includes all supported EVM networks including Wanchain, Ethereum, Avalanche, BNB Chain, Fantom, Moonriver, Moonbeam, etc.
## Crosschain transactions using the Wanchain Desktop Wallet
### Step 1: Enable ETH and wanETH to the Wanchain Desktop Wallet.
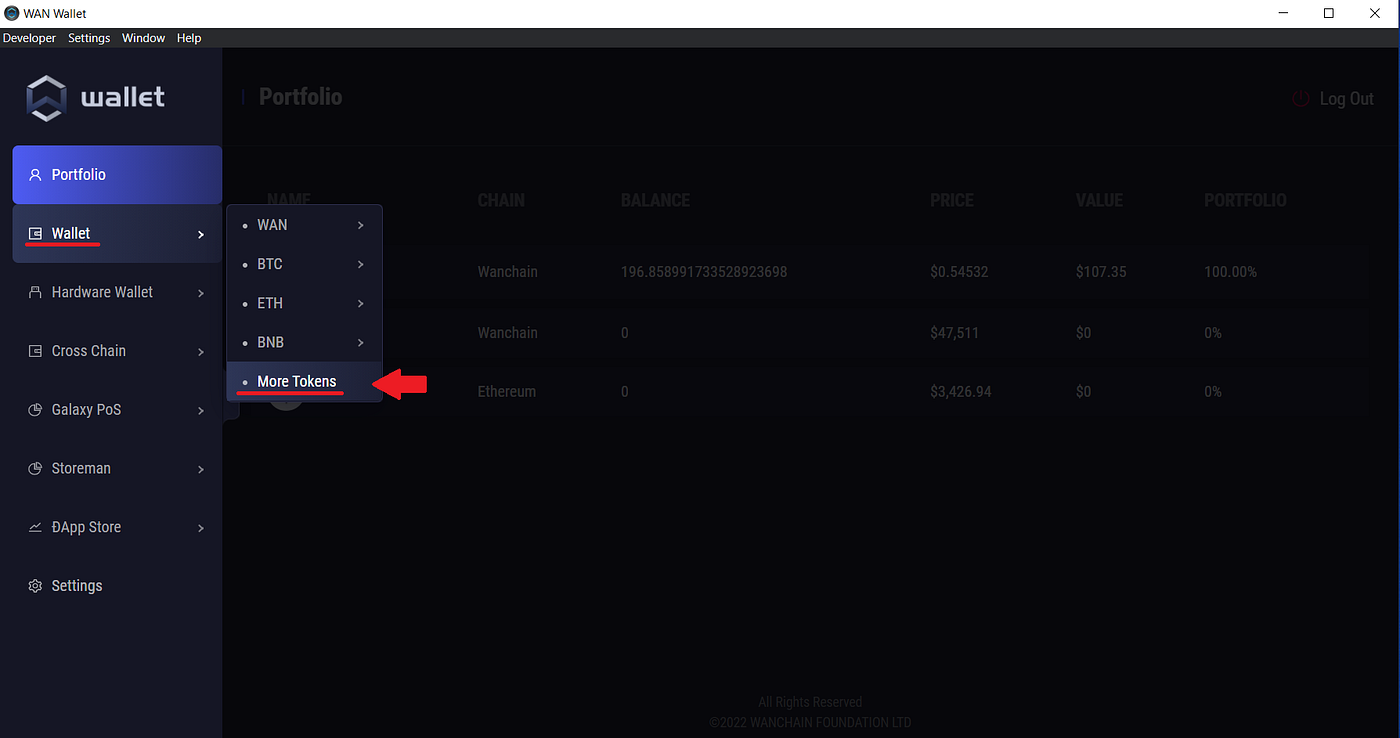
Navigate to **Wallet → More Tokens**.
Scroll down until you see **ETH**. Then, click the stars next to **ETH** and **wanETH**. As in the screenshot below.
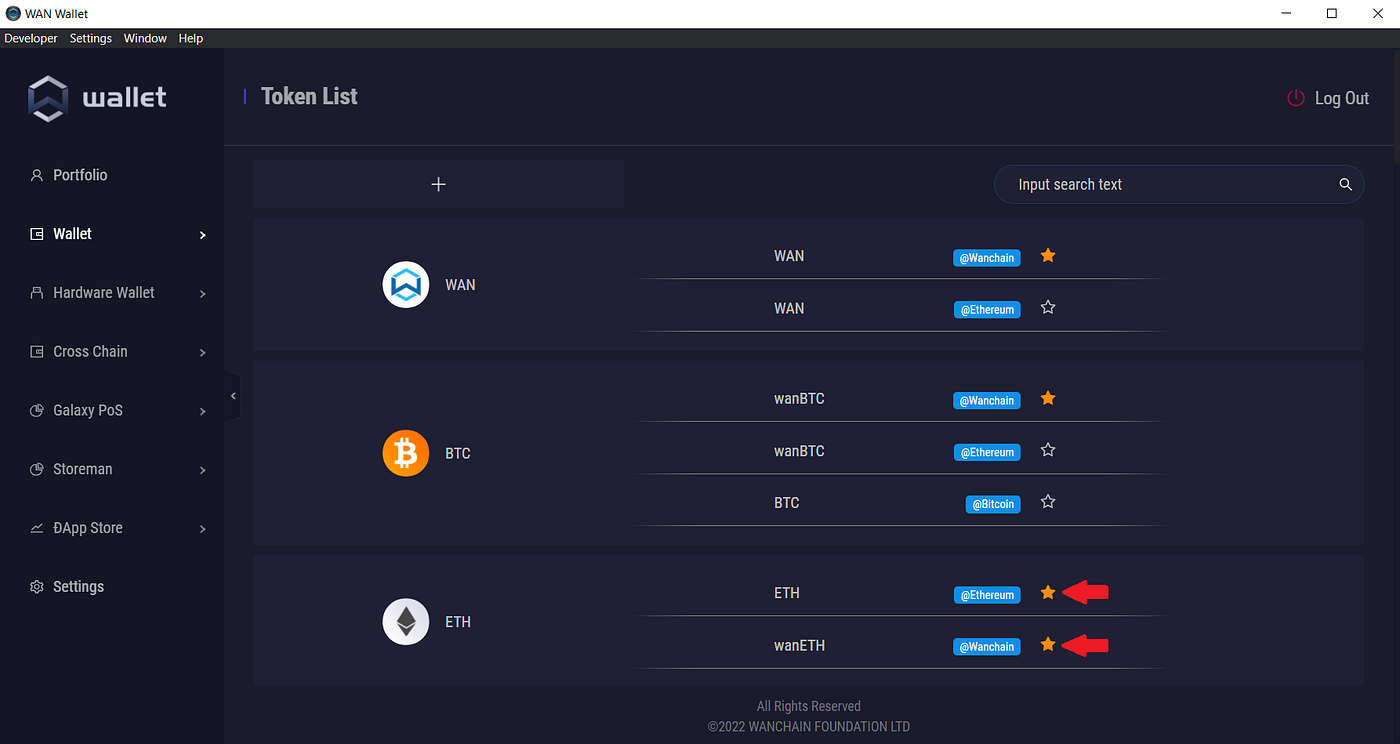
$ETH and $wanETH wallets are now enabled and appear in your portfolio overview.

### Step 2: Initiate a crosschain transaction to move your $ETH from Wanchain to Ethereum.
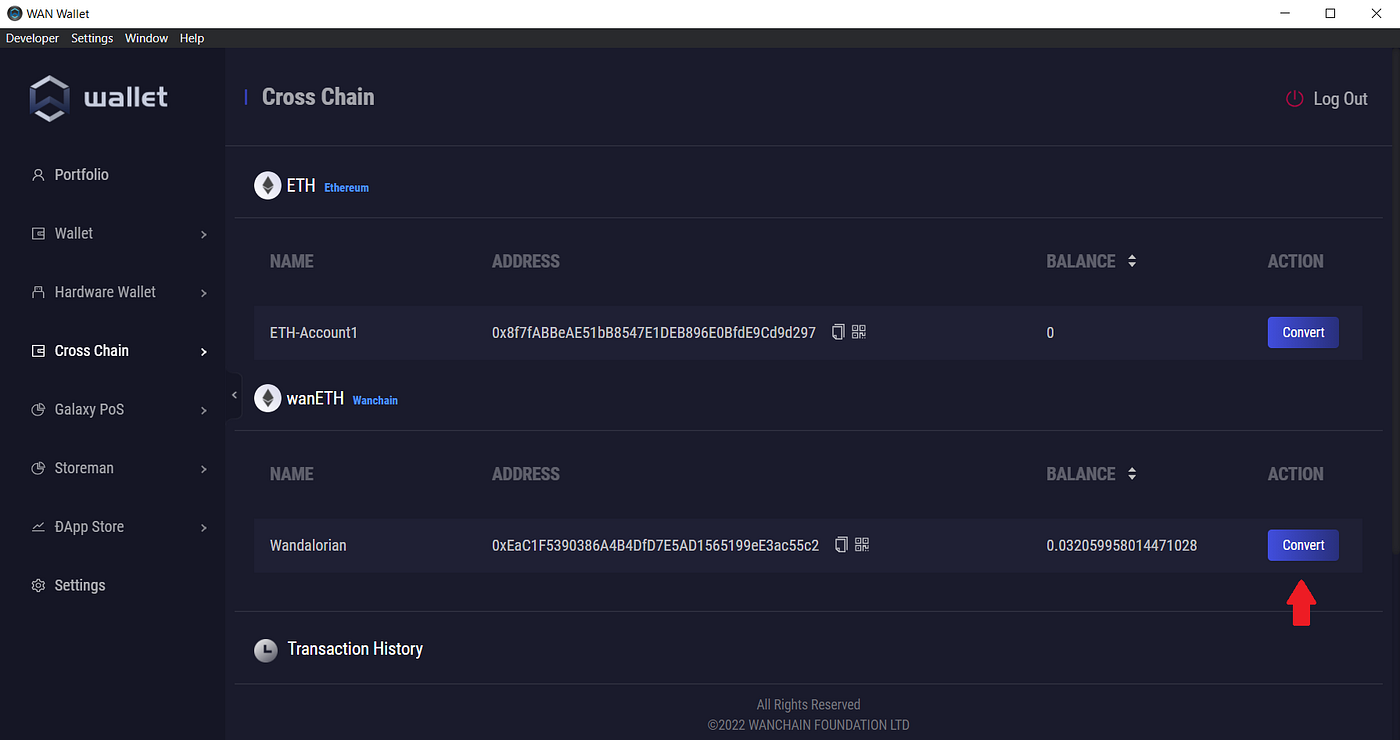
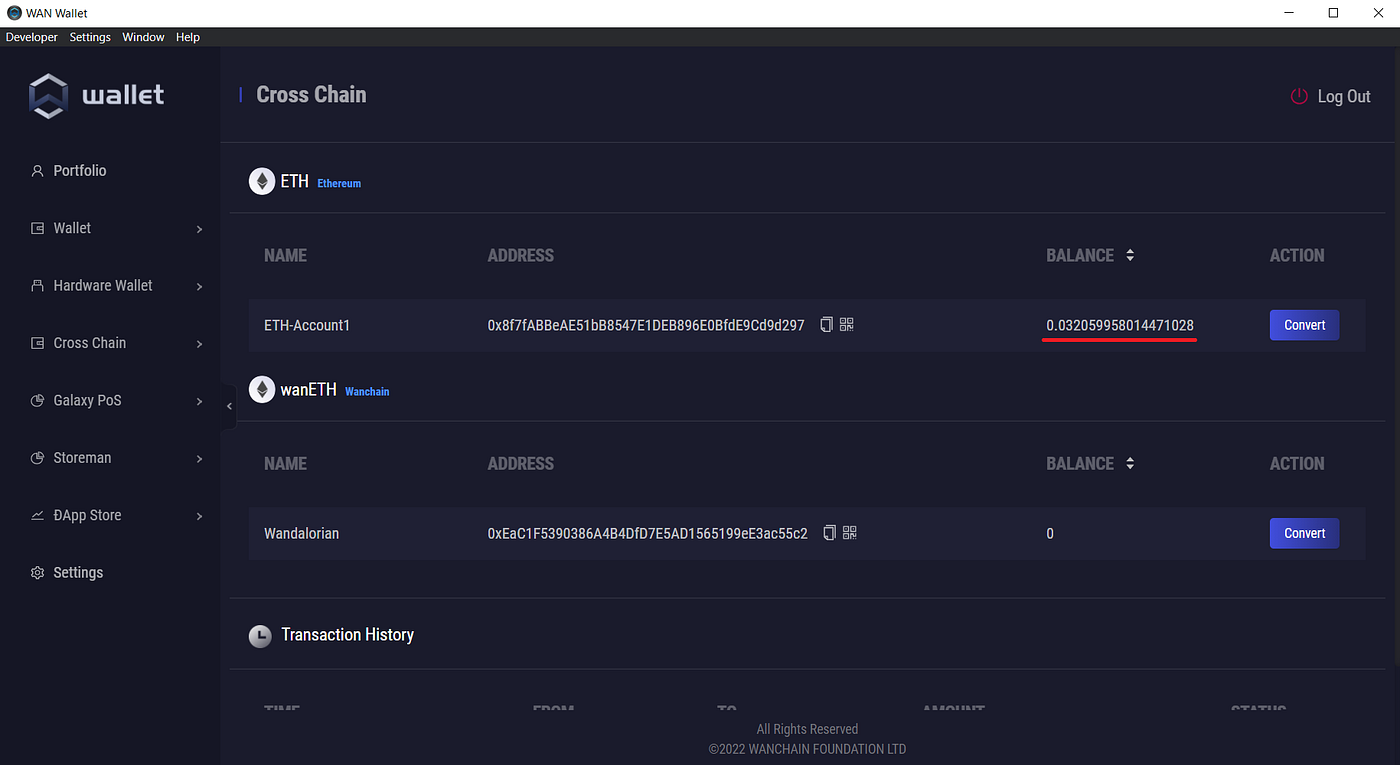
Navigate to **Cross Chain → ETH → Ethereum <-> Wanchain**
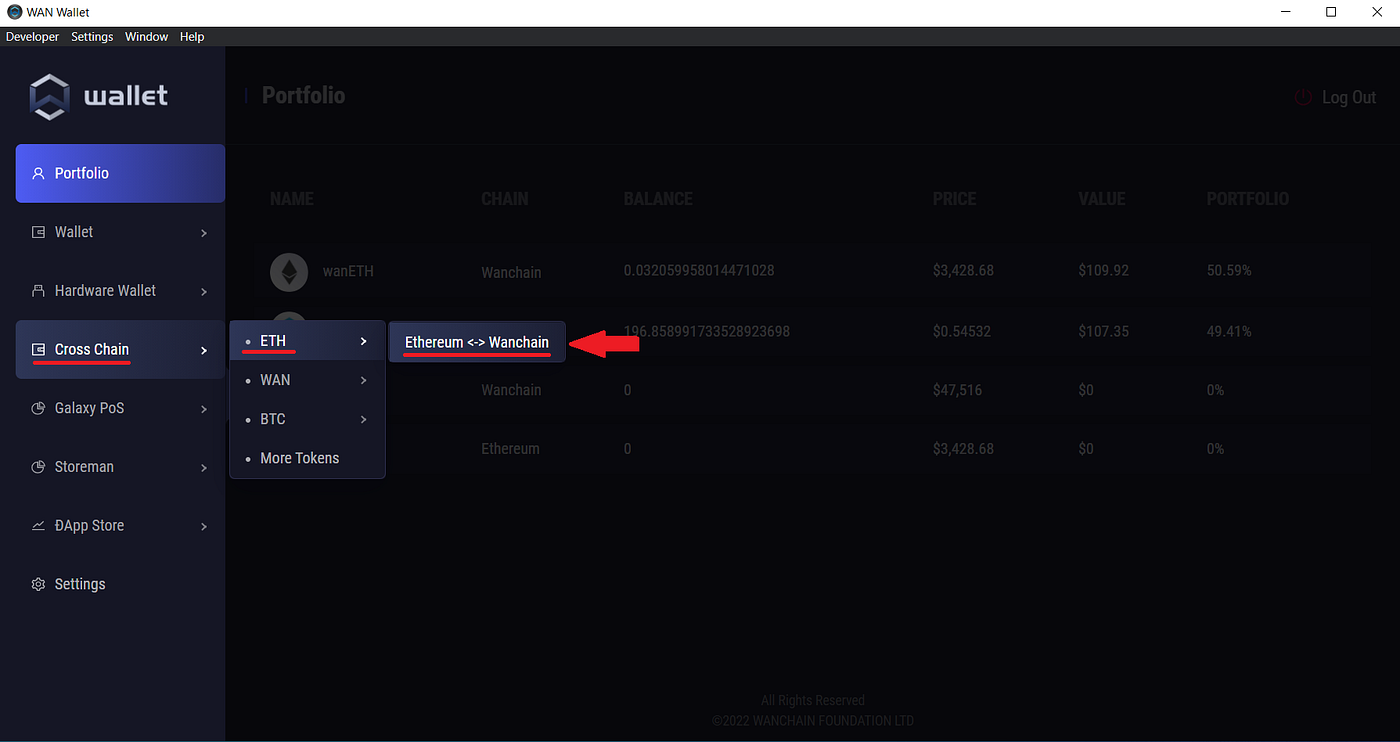
Since you are moving $ETH from Wanchain to Ethereum, click “Convert” next to your wanETH balance, as in the screenshot below. $ETH on Wanchain is called $wanETH.
Select which of your $ETH wallets you would like to receive the $ETH on Ethereum, enter the amount of $wanETH to convert, then click “**Next**”. Optionally, you can select “**Send Everything**” to move your entire $wanETH balance to Ethereum.
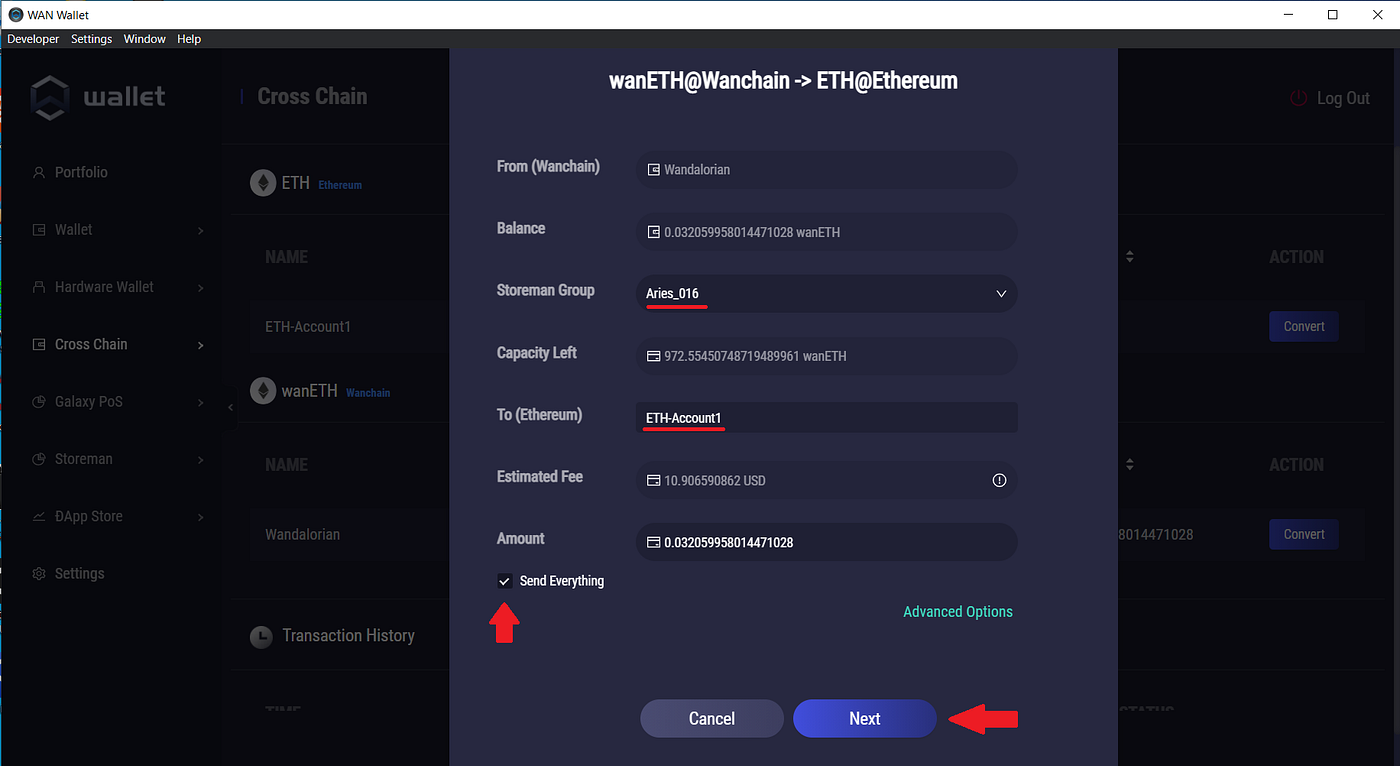
Confirm that all the details are correct then click “**Send**”. This will initiate the crosschain transaction.

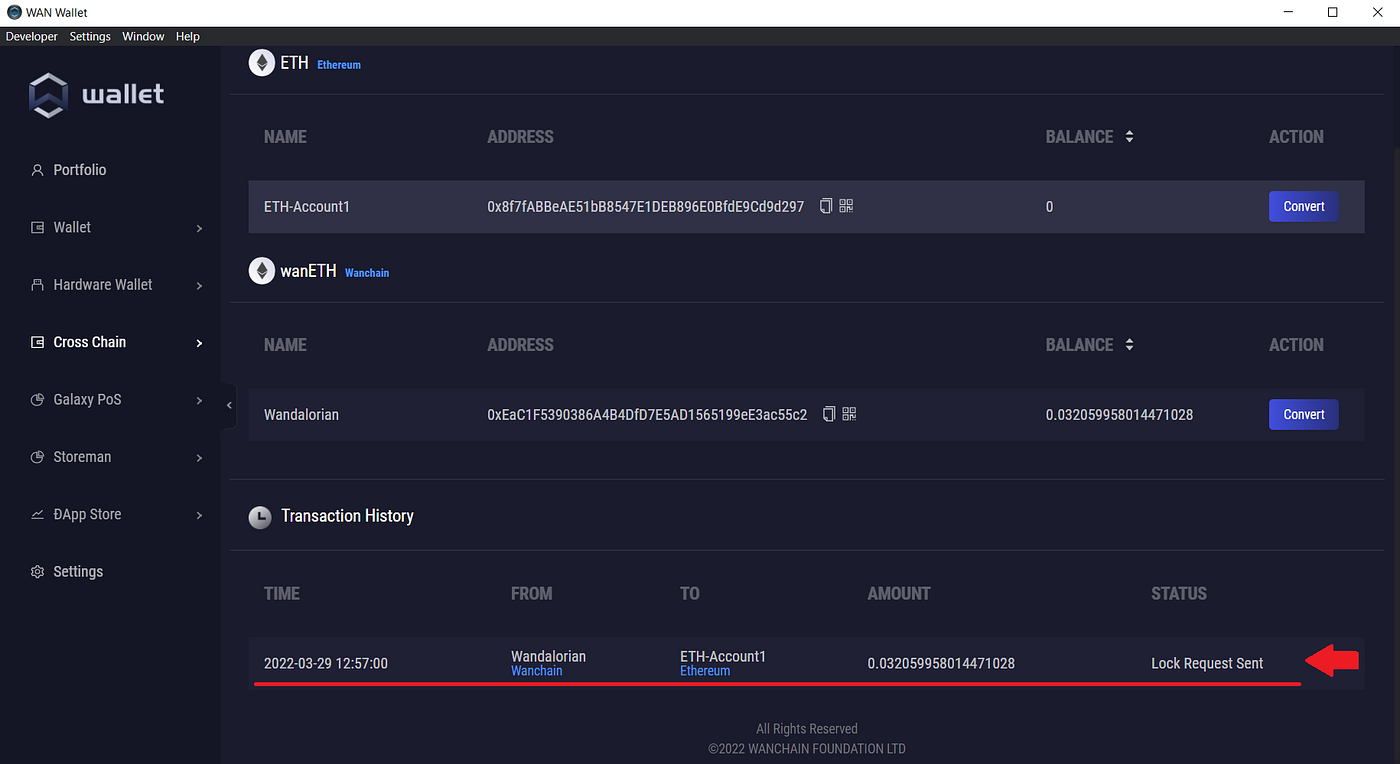
### Step 3: Wait for your crosschain transaction to complete. It is now processing.
While your crosschain transaction is processing, the status will change three times:
* Lock Request Sent
* Locked
* Success
> Note: The speed of the crosschain transaction is entirely dependent on the networks involved. Transactions involving slower networks like Bitcoin or Ethereum may take several minutes or more to complete.
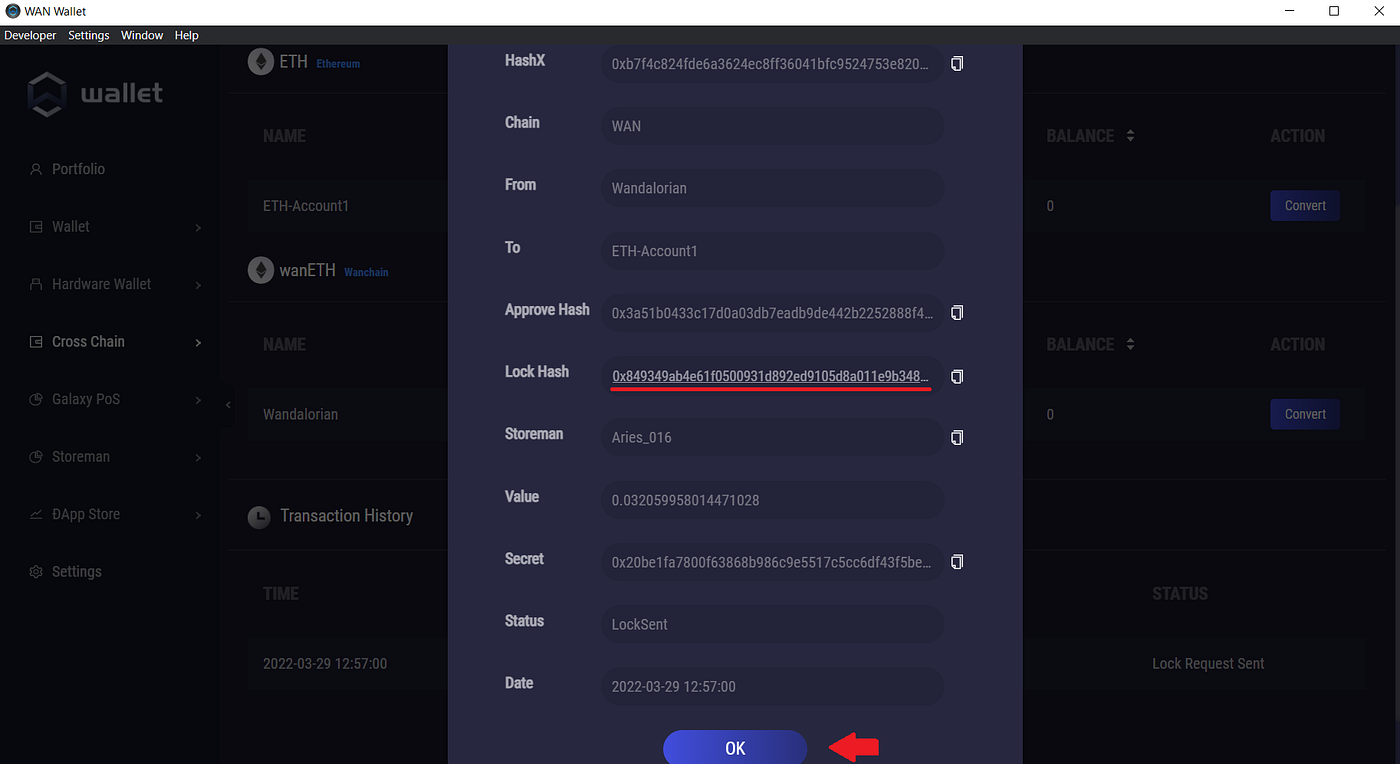
While your crosschain transaction is processing, you can the status to view more detailed information.
### Step 4: Confirm the receipt of your funds. Your crosschain transaction is complete!
Once your crosschain transaction is complete, you’ll see your $ETH balance on Ethereum, update and the crosschain transaction status change to “**success**”.
## Crosschain transactions using the WanBridge web portal
### Step 1: Make sure you have the appropriate wallets installed.
Before completing decentralised crosschain transactions using the [WanBridge web portal](https://bridge.wanchain.org/#/), you need to ensure you have access to the correct wallet(s). You must have wallets for each network involved in the crosschain transaction. [Metamask](https://metamask.io/) is a fantastic wallet that grants you access to any EVM-compatible blockchain networks.
[Download Metamask here](https://metamask.io/).
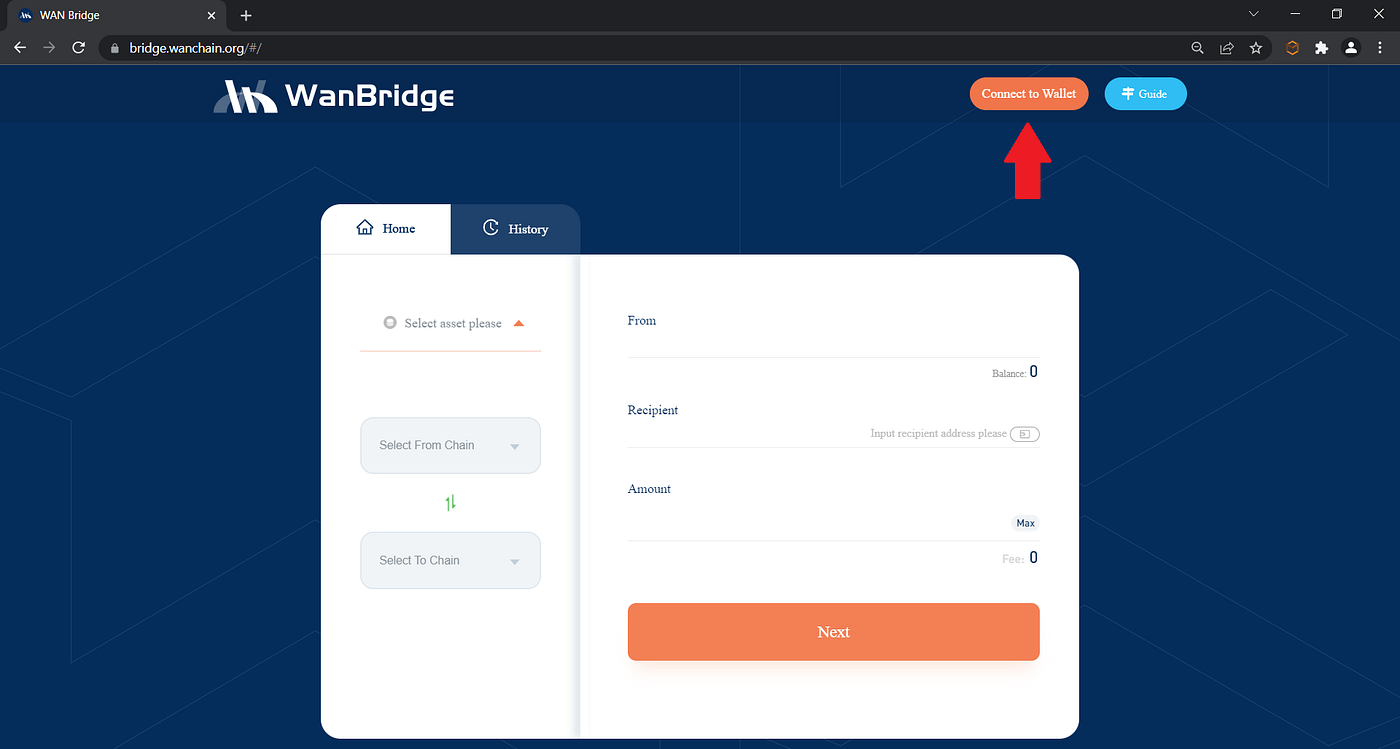
### Step 2: Visit the WanBridge web portal and connect your wallet.
Click “**Connect to Wallet**”.
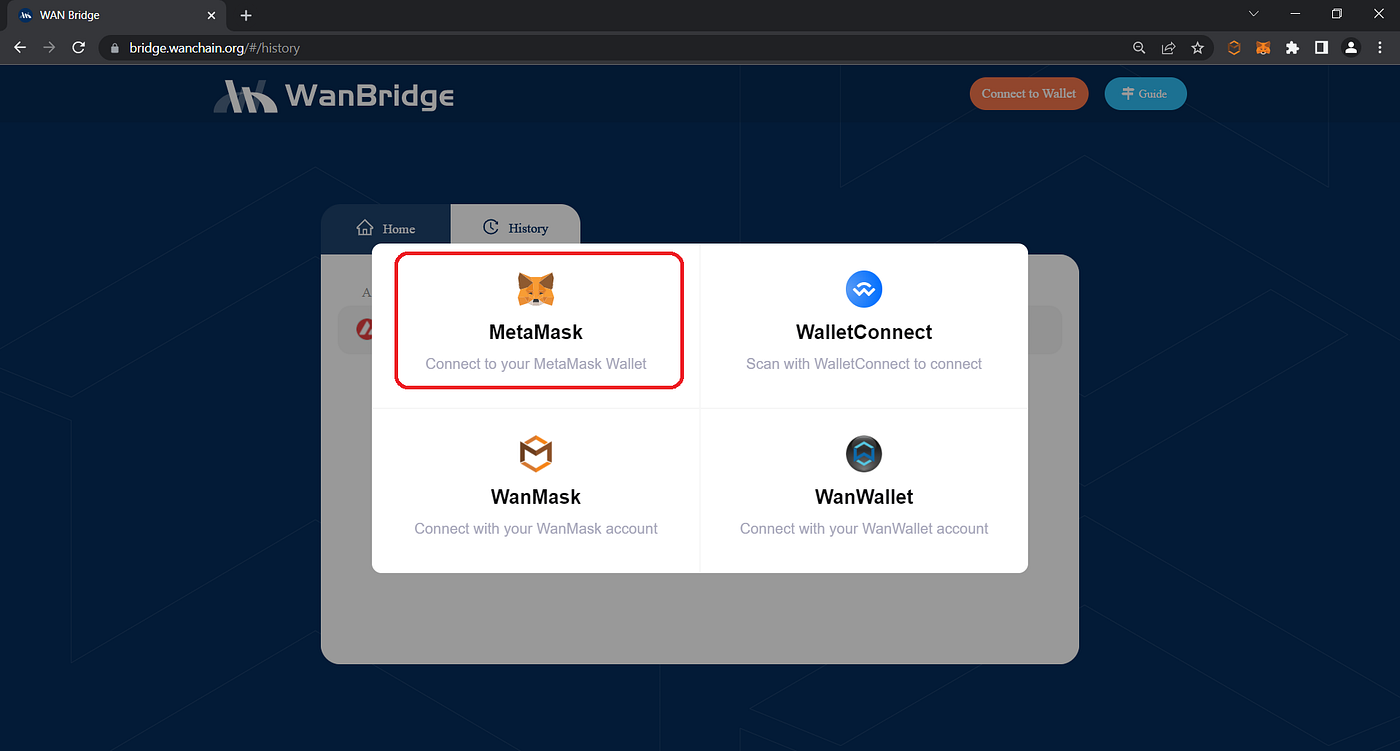
Click “**MetaMask**”.
If this is your first time using the [WanBridge web portal](https://bridge.wanchain.org/#/), you will first need to give permission to connect your wallet. Follow the MetaMask prompts by clicking “**Next**” then “**Connect**” as instructed.


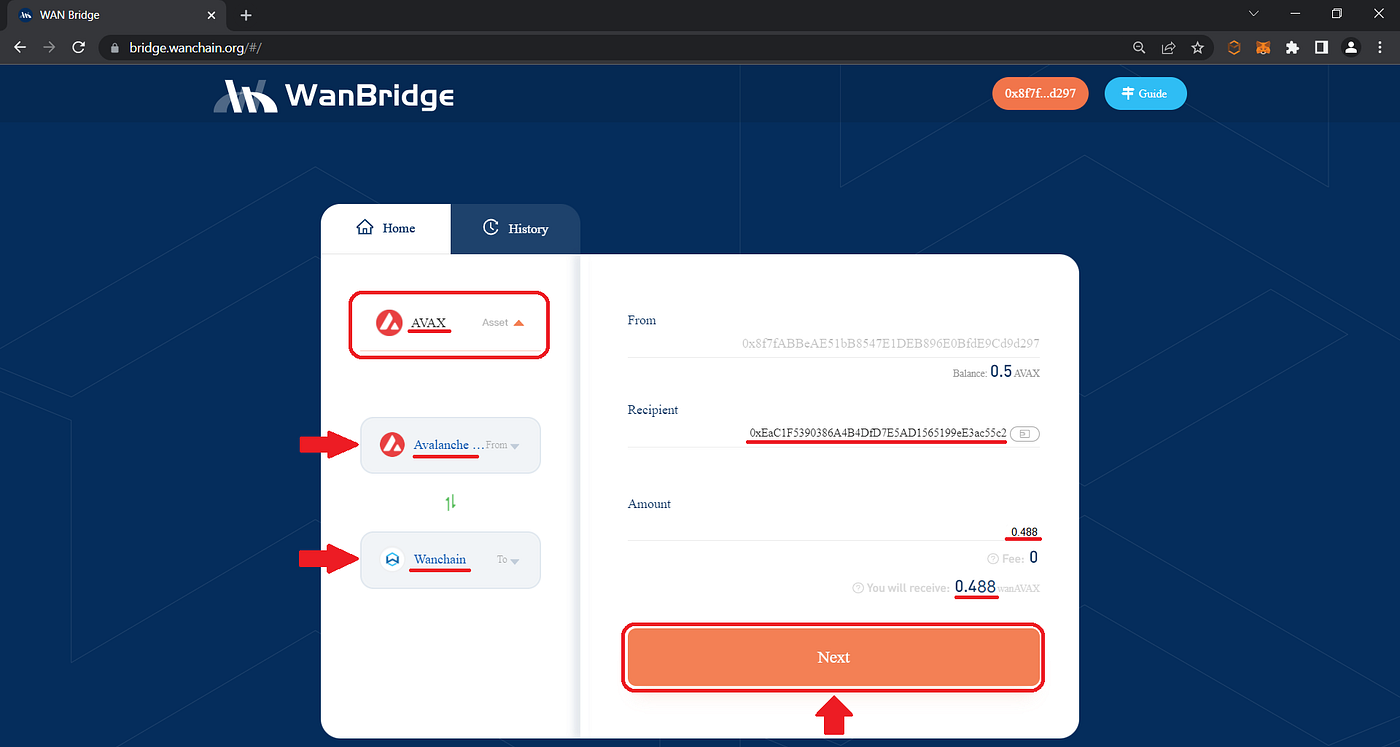
### Step 3: Initiate a crosschain transaction to move your $AVAX from Avalanche to Wanchain.
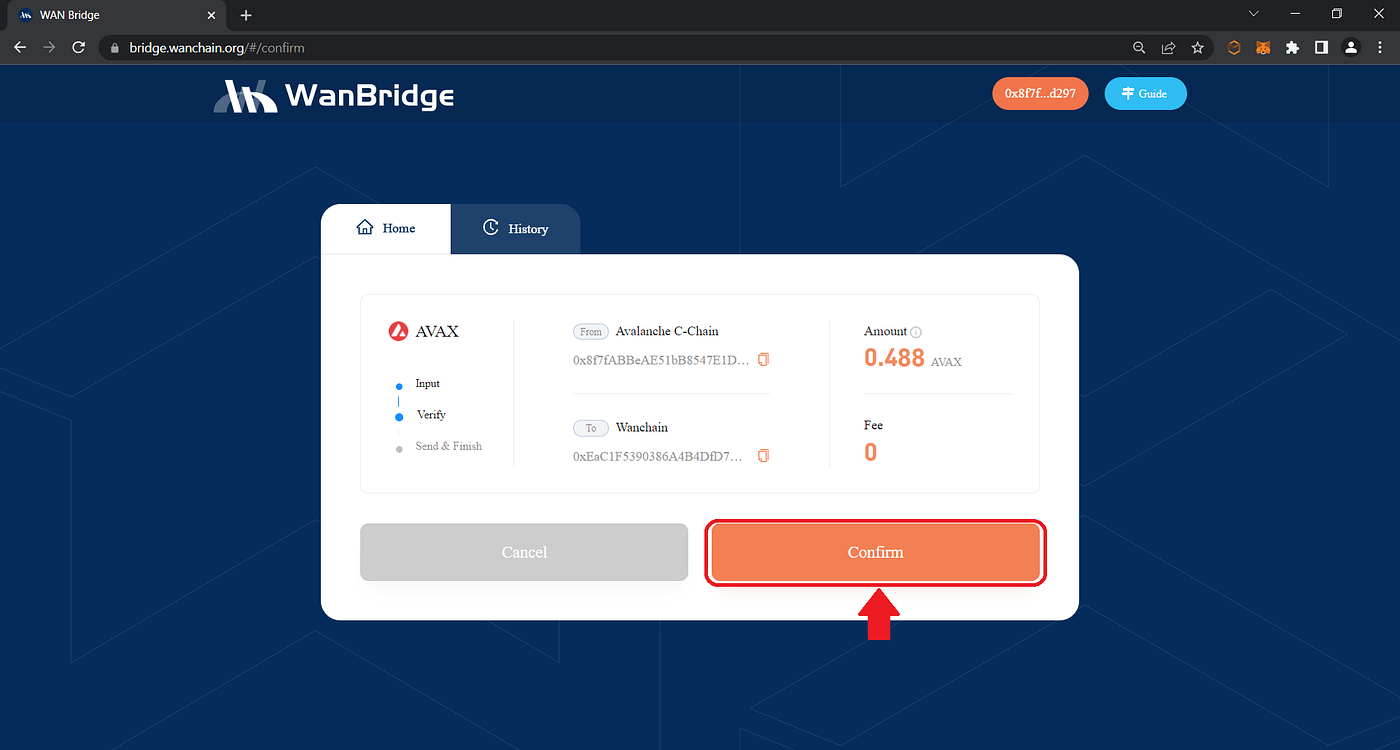
Select “**AVAX**” from the drop-down menu. Then, choose “**Avalanche C-chain**” and “**Wanchain**” as your *From* and *To* networks, respectively. Finally, input your destination address in the “**Recipient**” field as well as the amount of $AVAX you want to send crosschain. Click “**Next**”.
Confirm that all the details are correct then click “**Confirm**”.
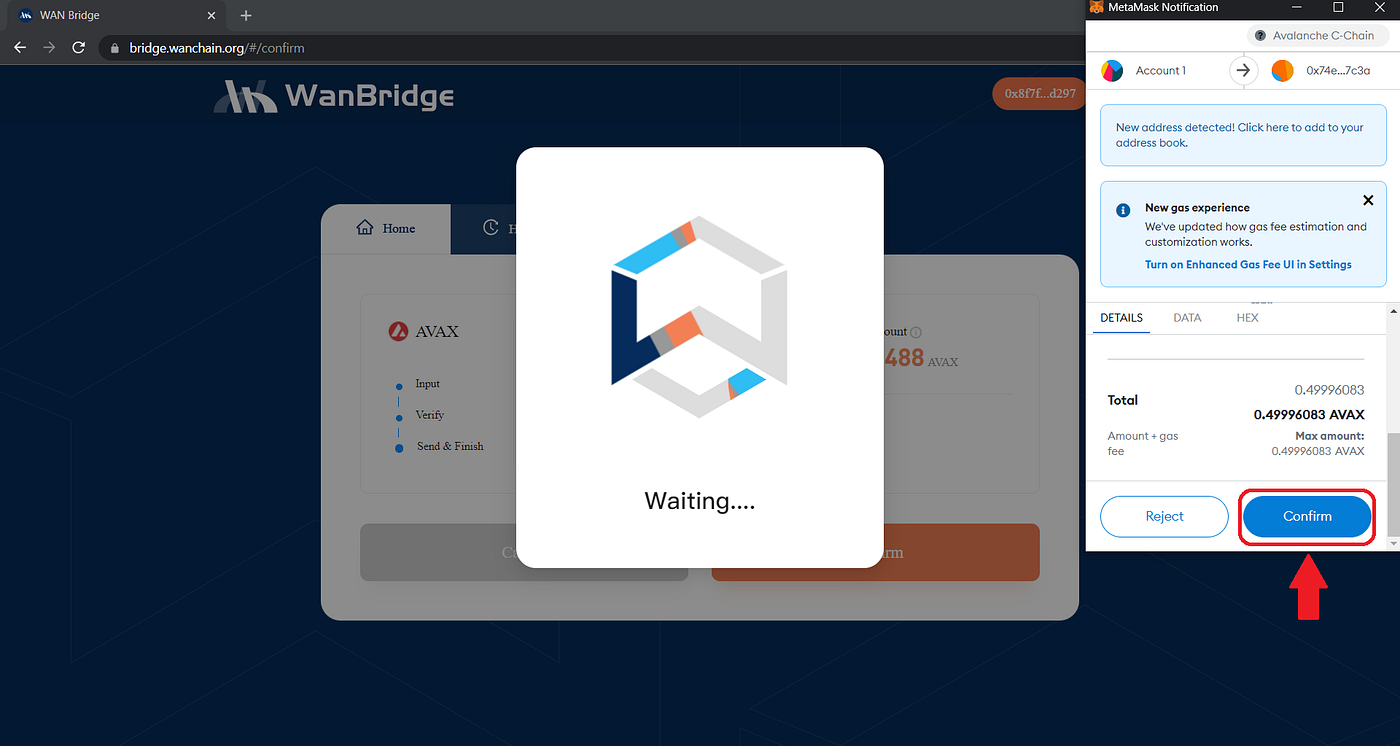
Confirm the transaction by clicking “**Confirm**” in the MetaMask pop-up window.
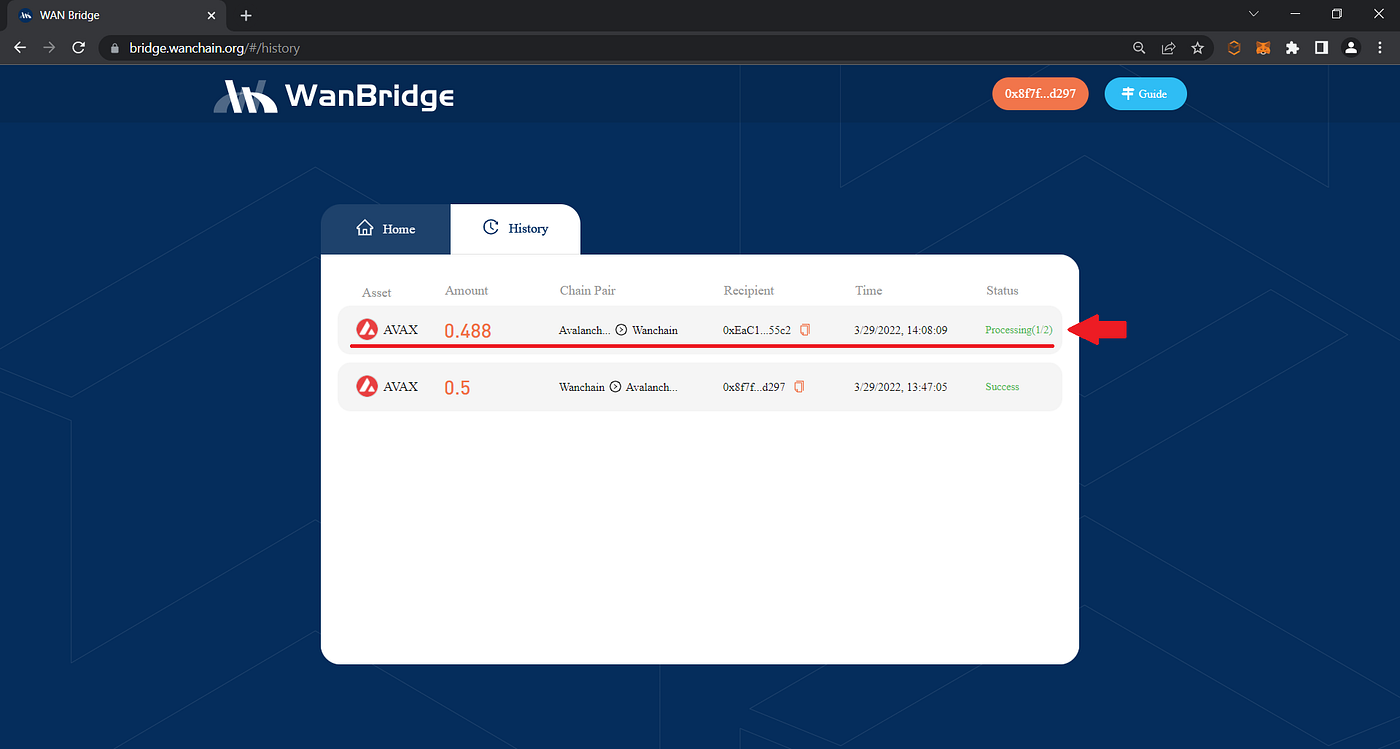
### Step 4: Wait for your crosschain transaction to complete. It is now processing.
While your crosschain transaction is processing, the status will change three times:
* Processing (1/2)
* Processing (2/2)
* Success
> Note: The speed of the crosschain transaction is entirely dependent on the networks involved. Transactions involving slower networks like Bitcoin or Ethereum may take several minutes or more to complete.
### Step 5: Confirm the receipt of your funds. Your crosschain transaction is complete!
Once your crosschain transaction is complete, you’ll see your $AVAX balance on Wanchain (called $wanAVAX) and the crosschain transaction status change to “**success**”.
### Need help?
Join our [Telegram Tech Support](https://t.me/WanchainSupport) channel. Our support team is standing by and happy to help!
> Note: If you receive a DM offering help, block them immediately. Admins will never DM you first! Never share your seed words with anyone, period.
---
# Agent Instructions
This documentation is published with GitBook. GitBook is the documentation platform designed so that both humans and AI agents can read, navigate, and reason over technical content effectively. Learn more at gitbook.com.
## Querying This Documentation
If you need additional information that is not directly available in this page, you can query the documentation dynamically by asking a question.
Perform an HTTP GET request on the current page URL with the `ask` query parameter, and the optional `goal` query parameter:
```
GET https://docs.wanchain.org/guide/crosschain-transaction-guide-evm-compatible-networks.md?ask=&goal=
```
`ask` is the immediate question: it should be specific, self-contained, and written in natural language.
`goal` is optional and describes the broader end goal you are ultimately trying to accomplish on behalf of the user. GitBook uses it to tailor the answer towards what is most useful for that goal.
The response will contain a direct answer to the question and relevant excerpts and sources from the documentation.
Use this mechanism when the answer is not explicitly present in the current page, you need clarification or additional context, or you want to retrieve related documentation sections.